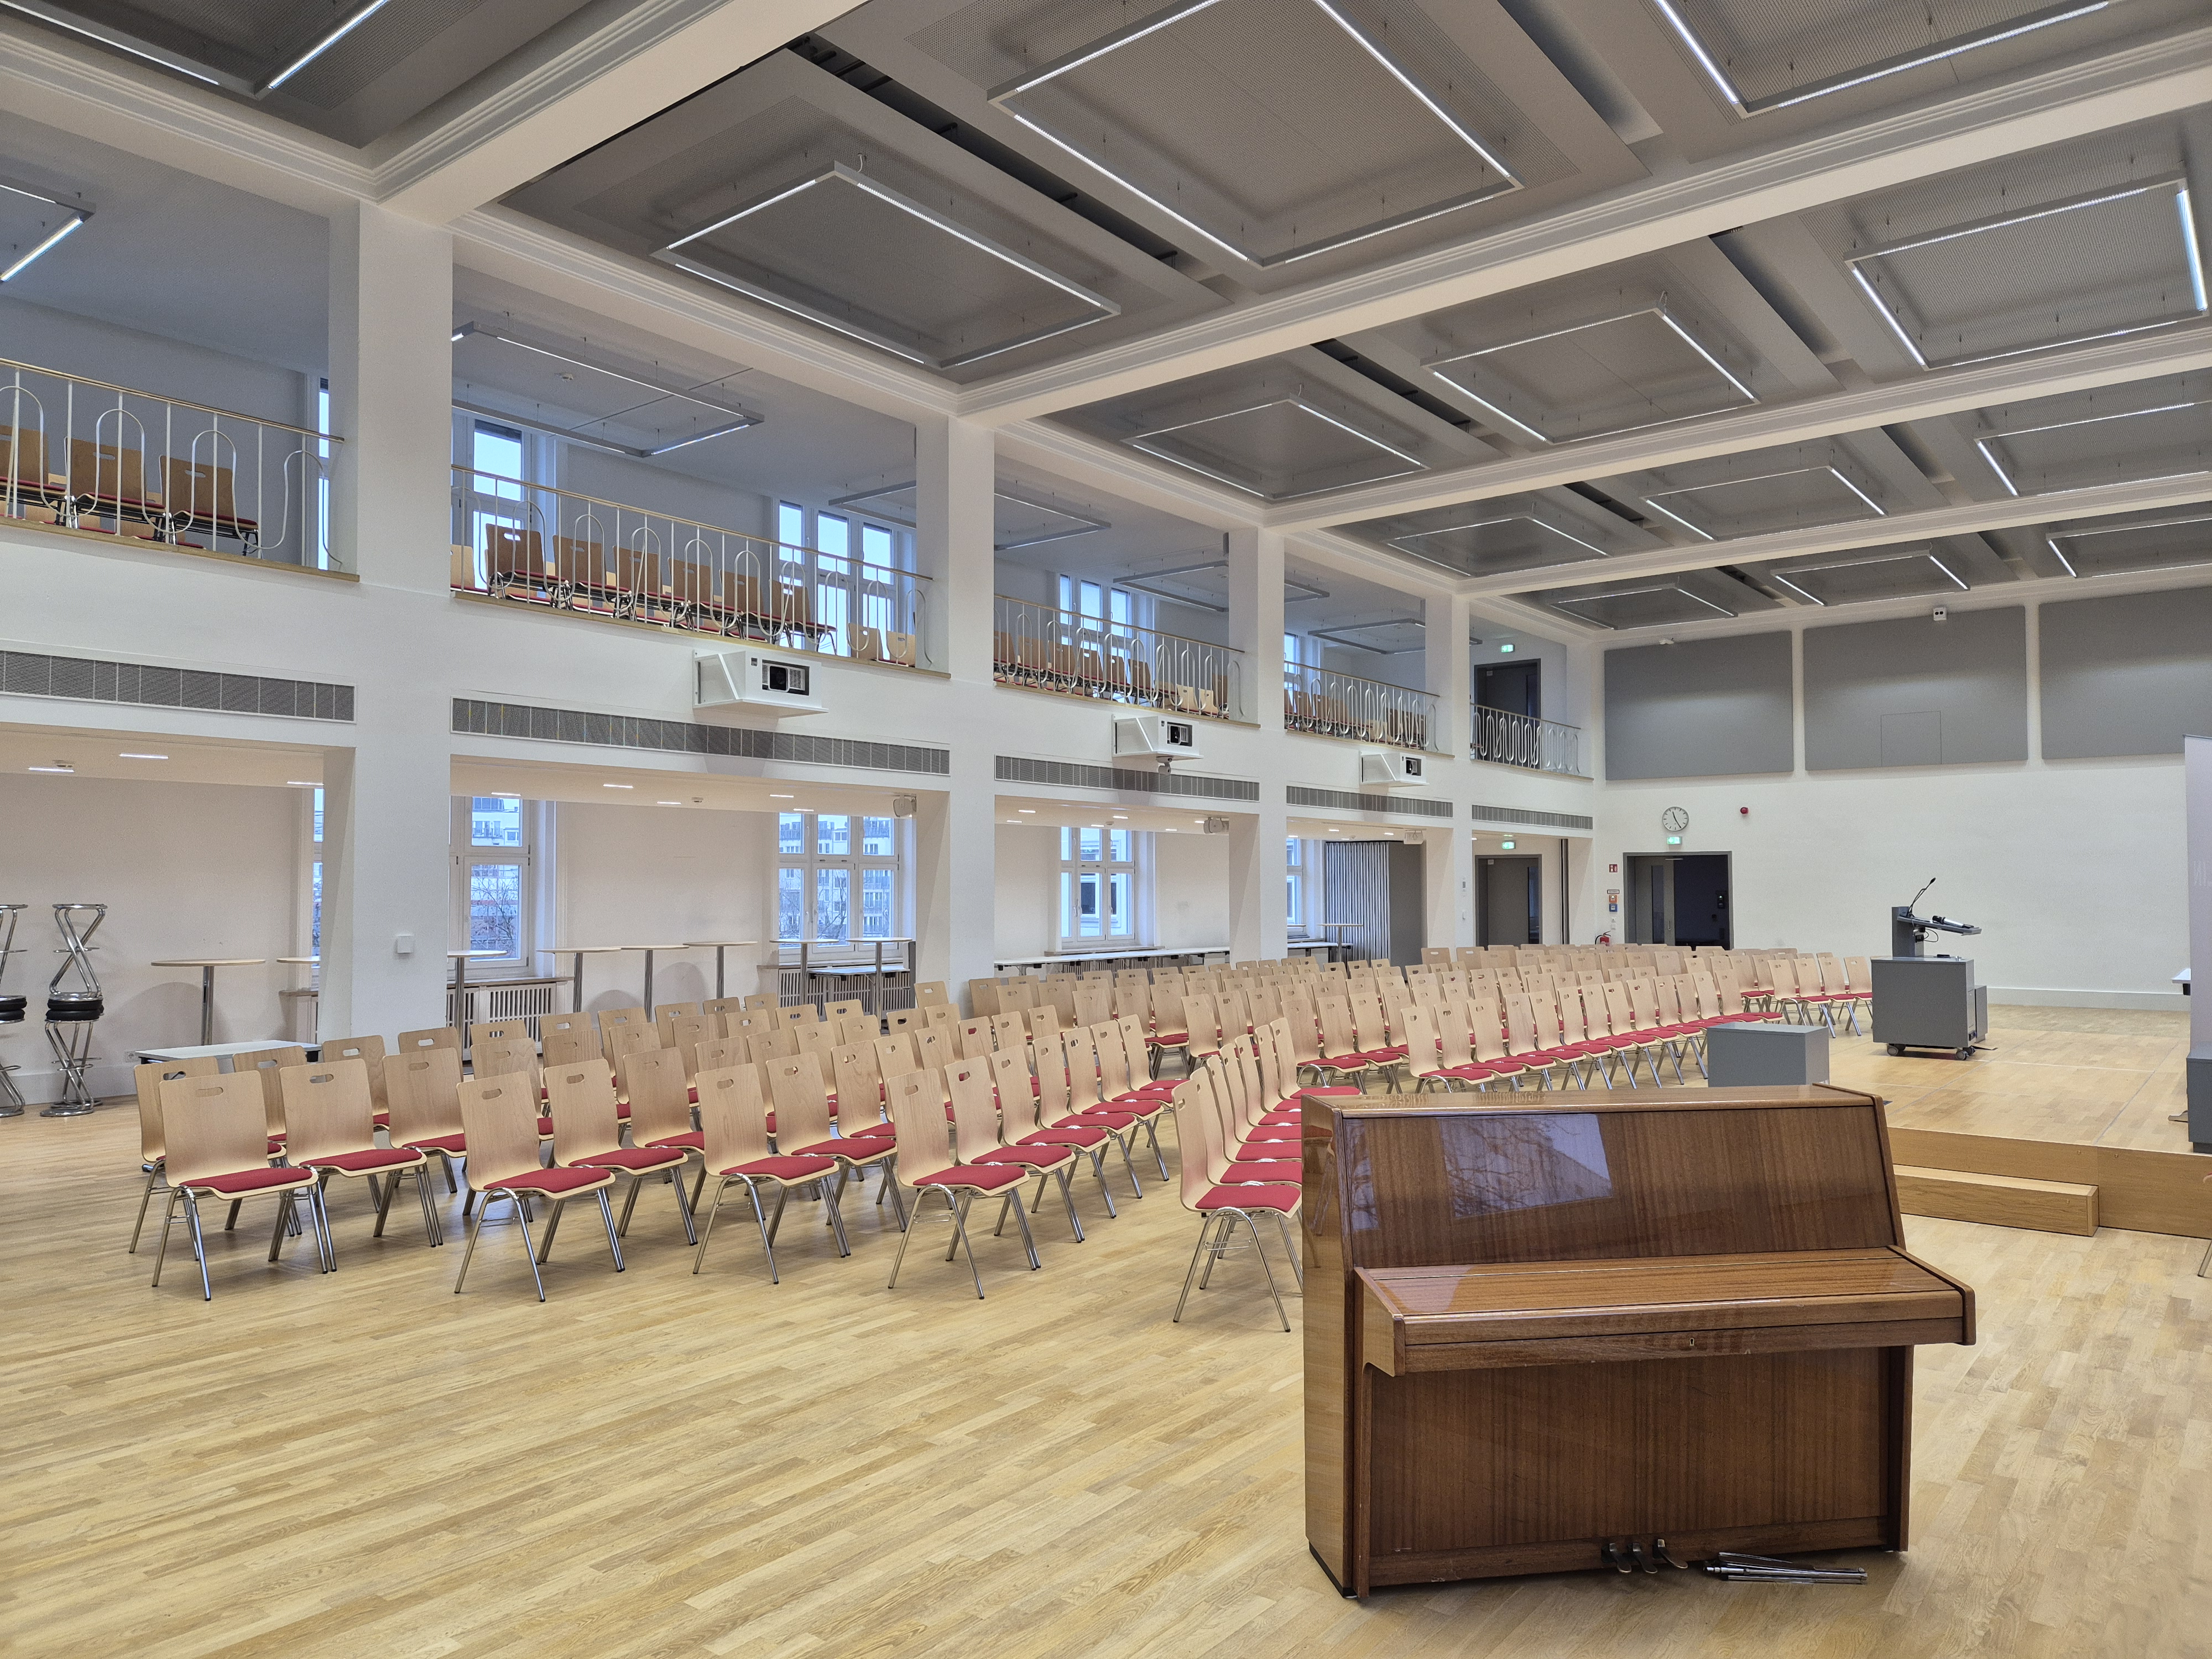
The auditorium at the Campus Schöneberg offers modern equipment with microphones, three projectors/screens, and intuitive iPad control. It is ideal for graduation ceremonies, (hybrid) events, and conferences.
Reserve auditorium
If you wish to plan and hold an event in the auditorium at Campus Schöneberg, please reserve it as early as possible via:
veranstaltung@hwr-berlin.de
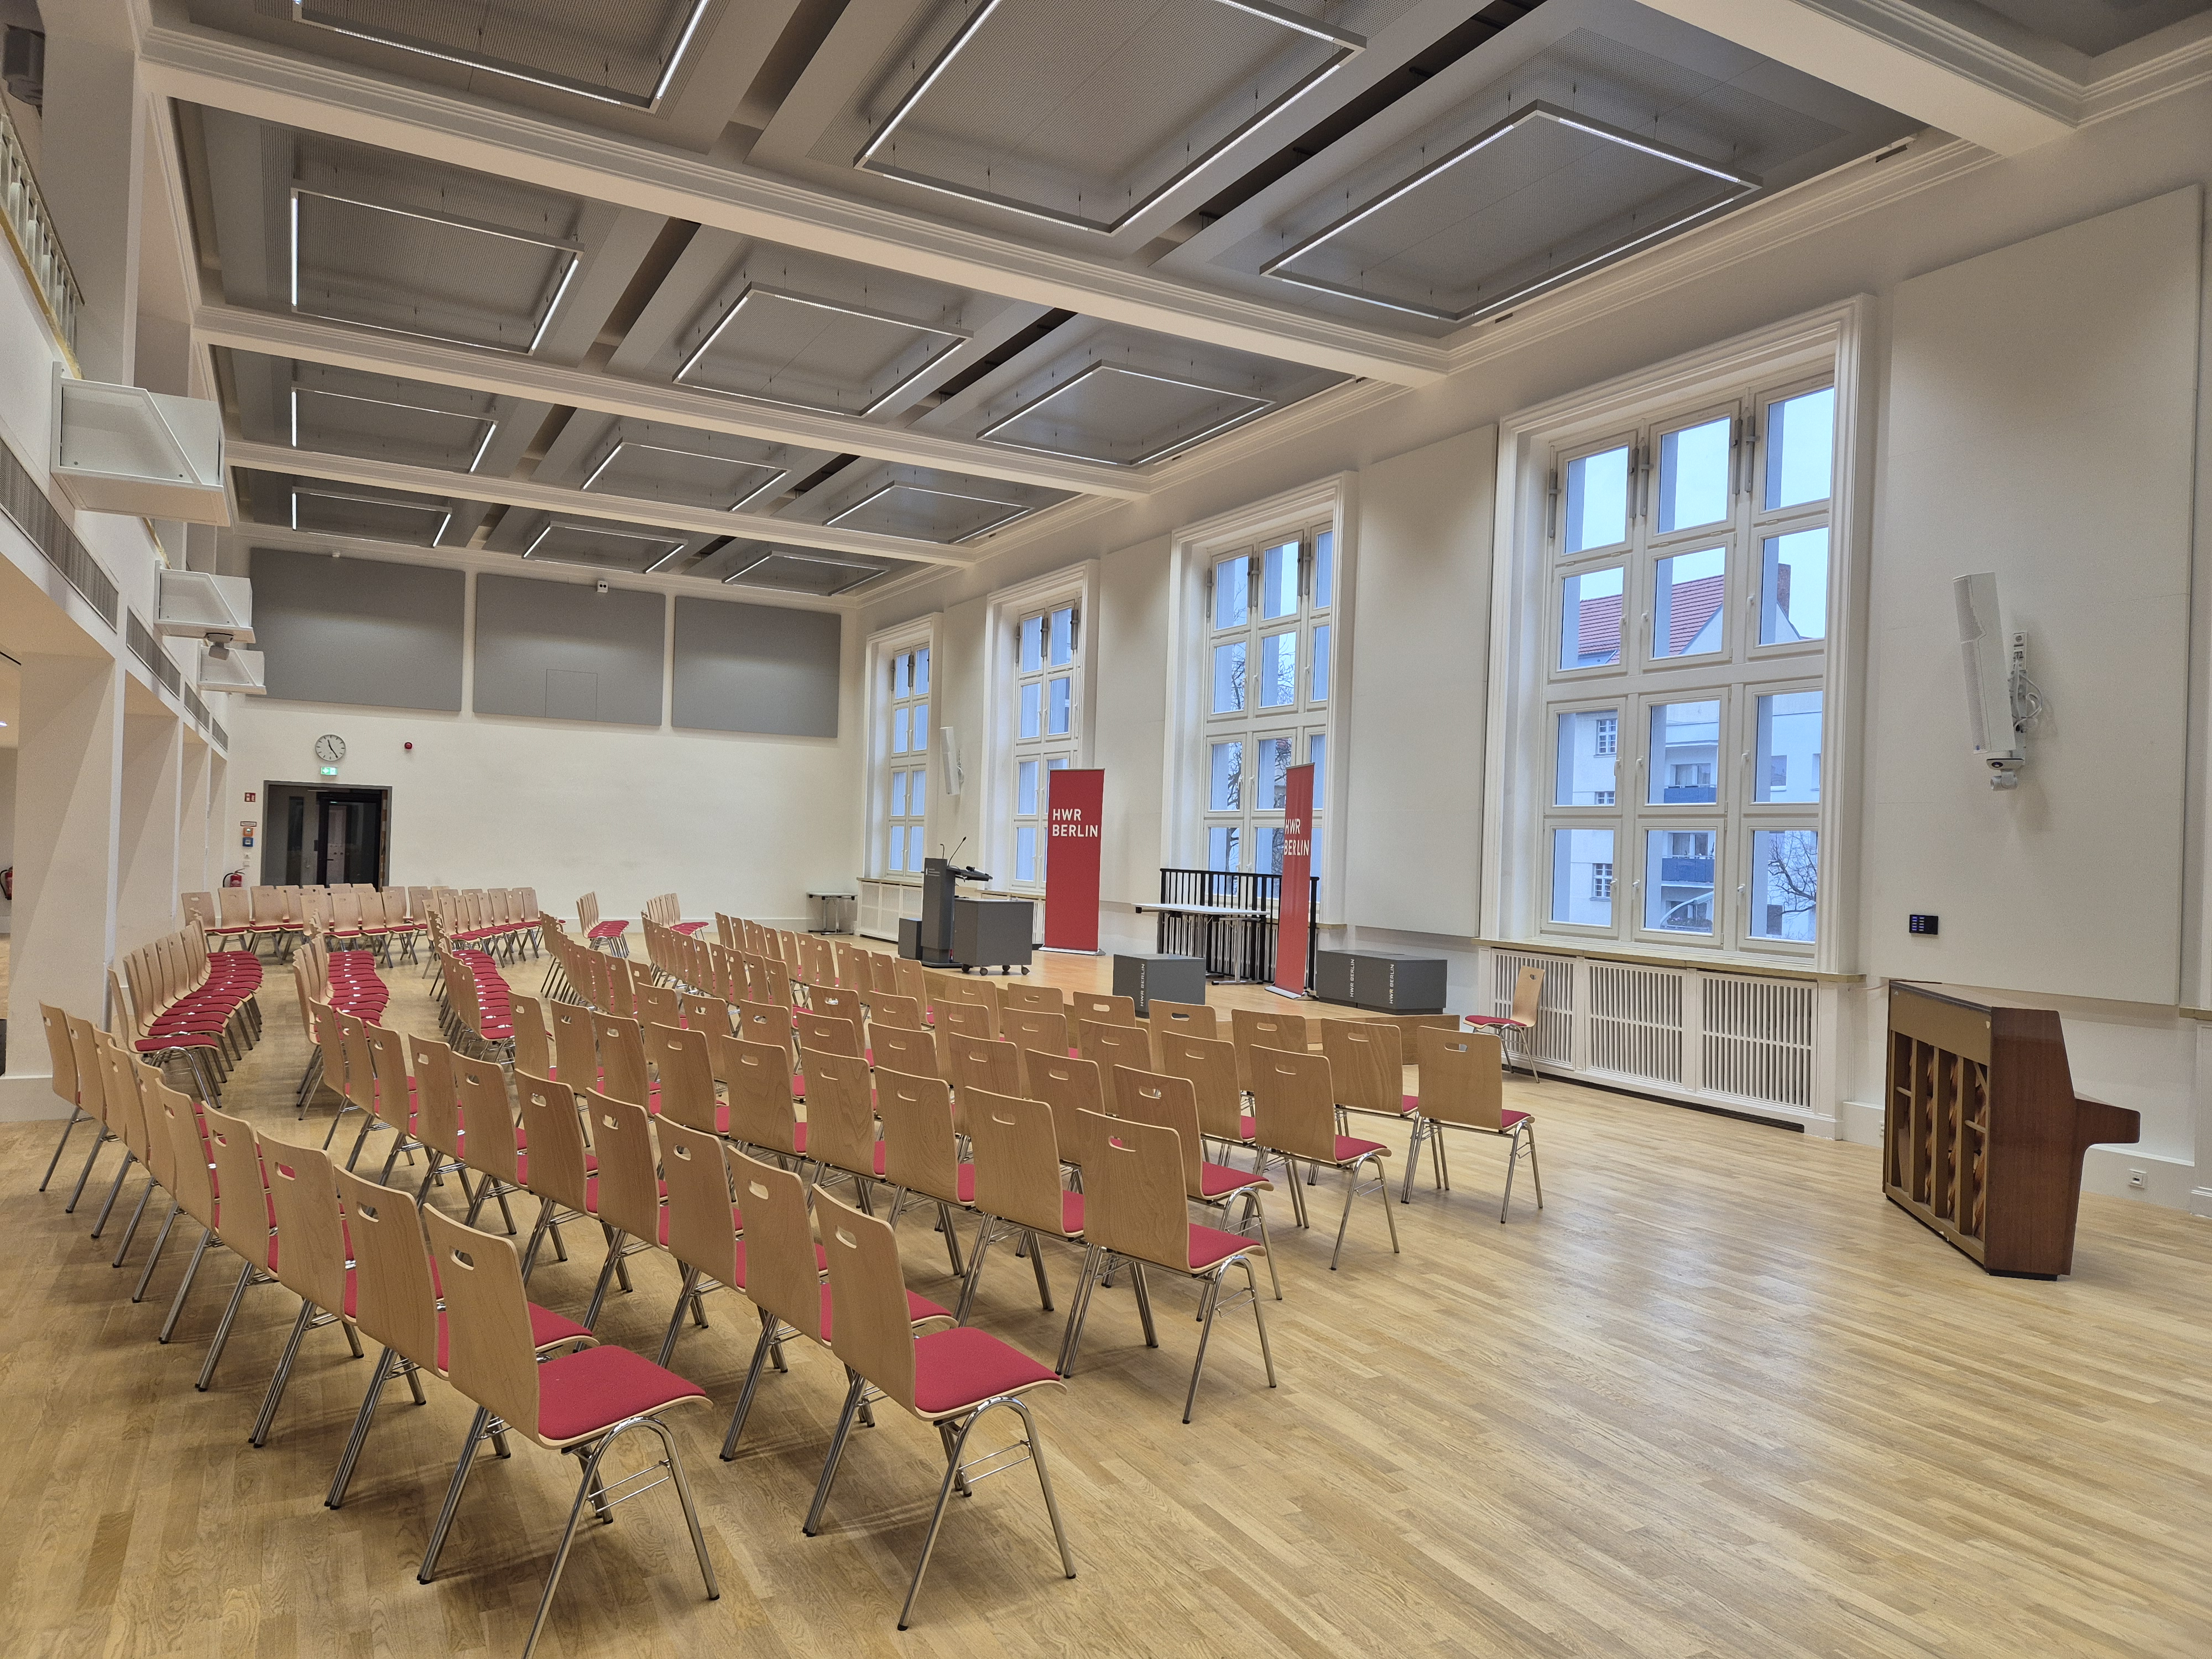
Seating
The appropriate seating arrangement is crucial to meet requirements effectively and highlight the nature of the event. Whether it’s row seating for lectures, banquet seating for festive occasions, or group seating for workshops, the right arrangement enhances comfort, communication, and optimal space utilization.
Loan from the porter
Please check in by Building B Porter before the event begins. There, you will receive both the key and the equipment for the auditorium’s media technology:
- iPad for media control (possibly with USB-C charger)
- Wireless microphones:
- 6 handheld microphones
- 2 lapel microphones
- 2 throwable microphones “Catchbox” (red cubes)
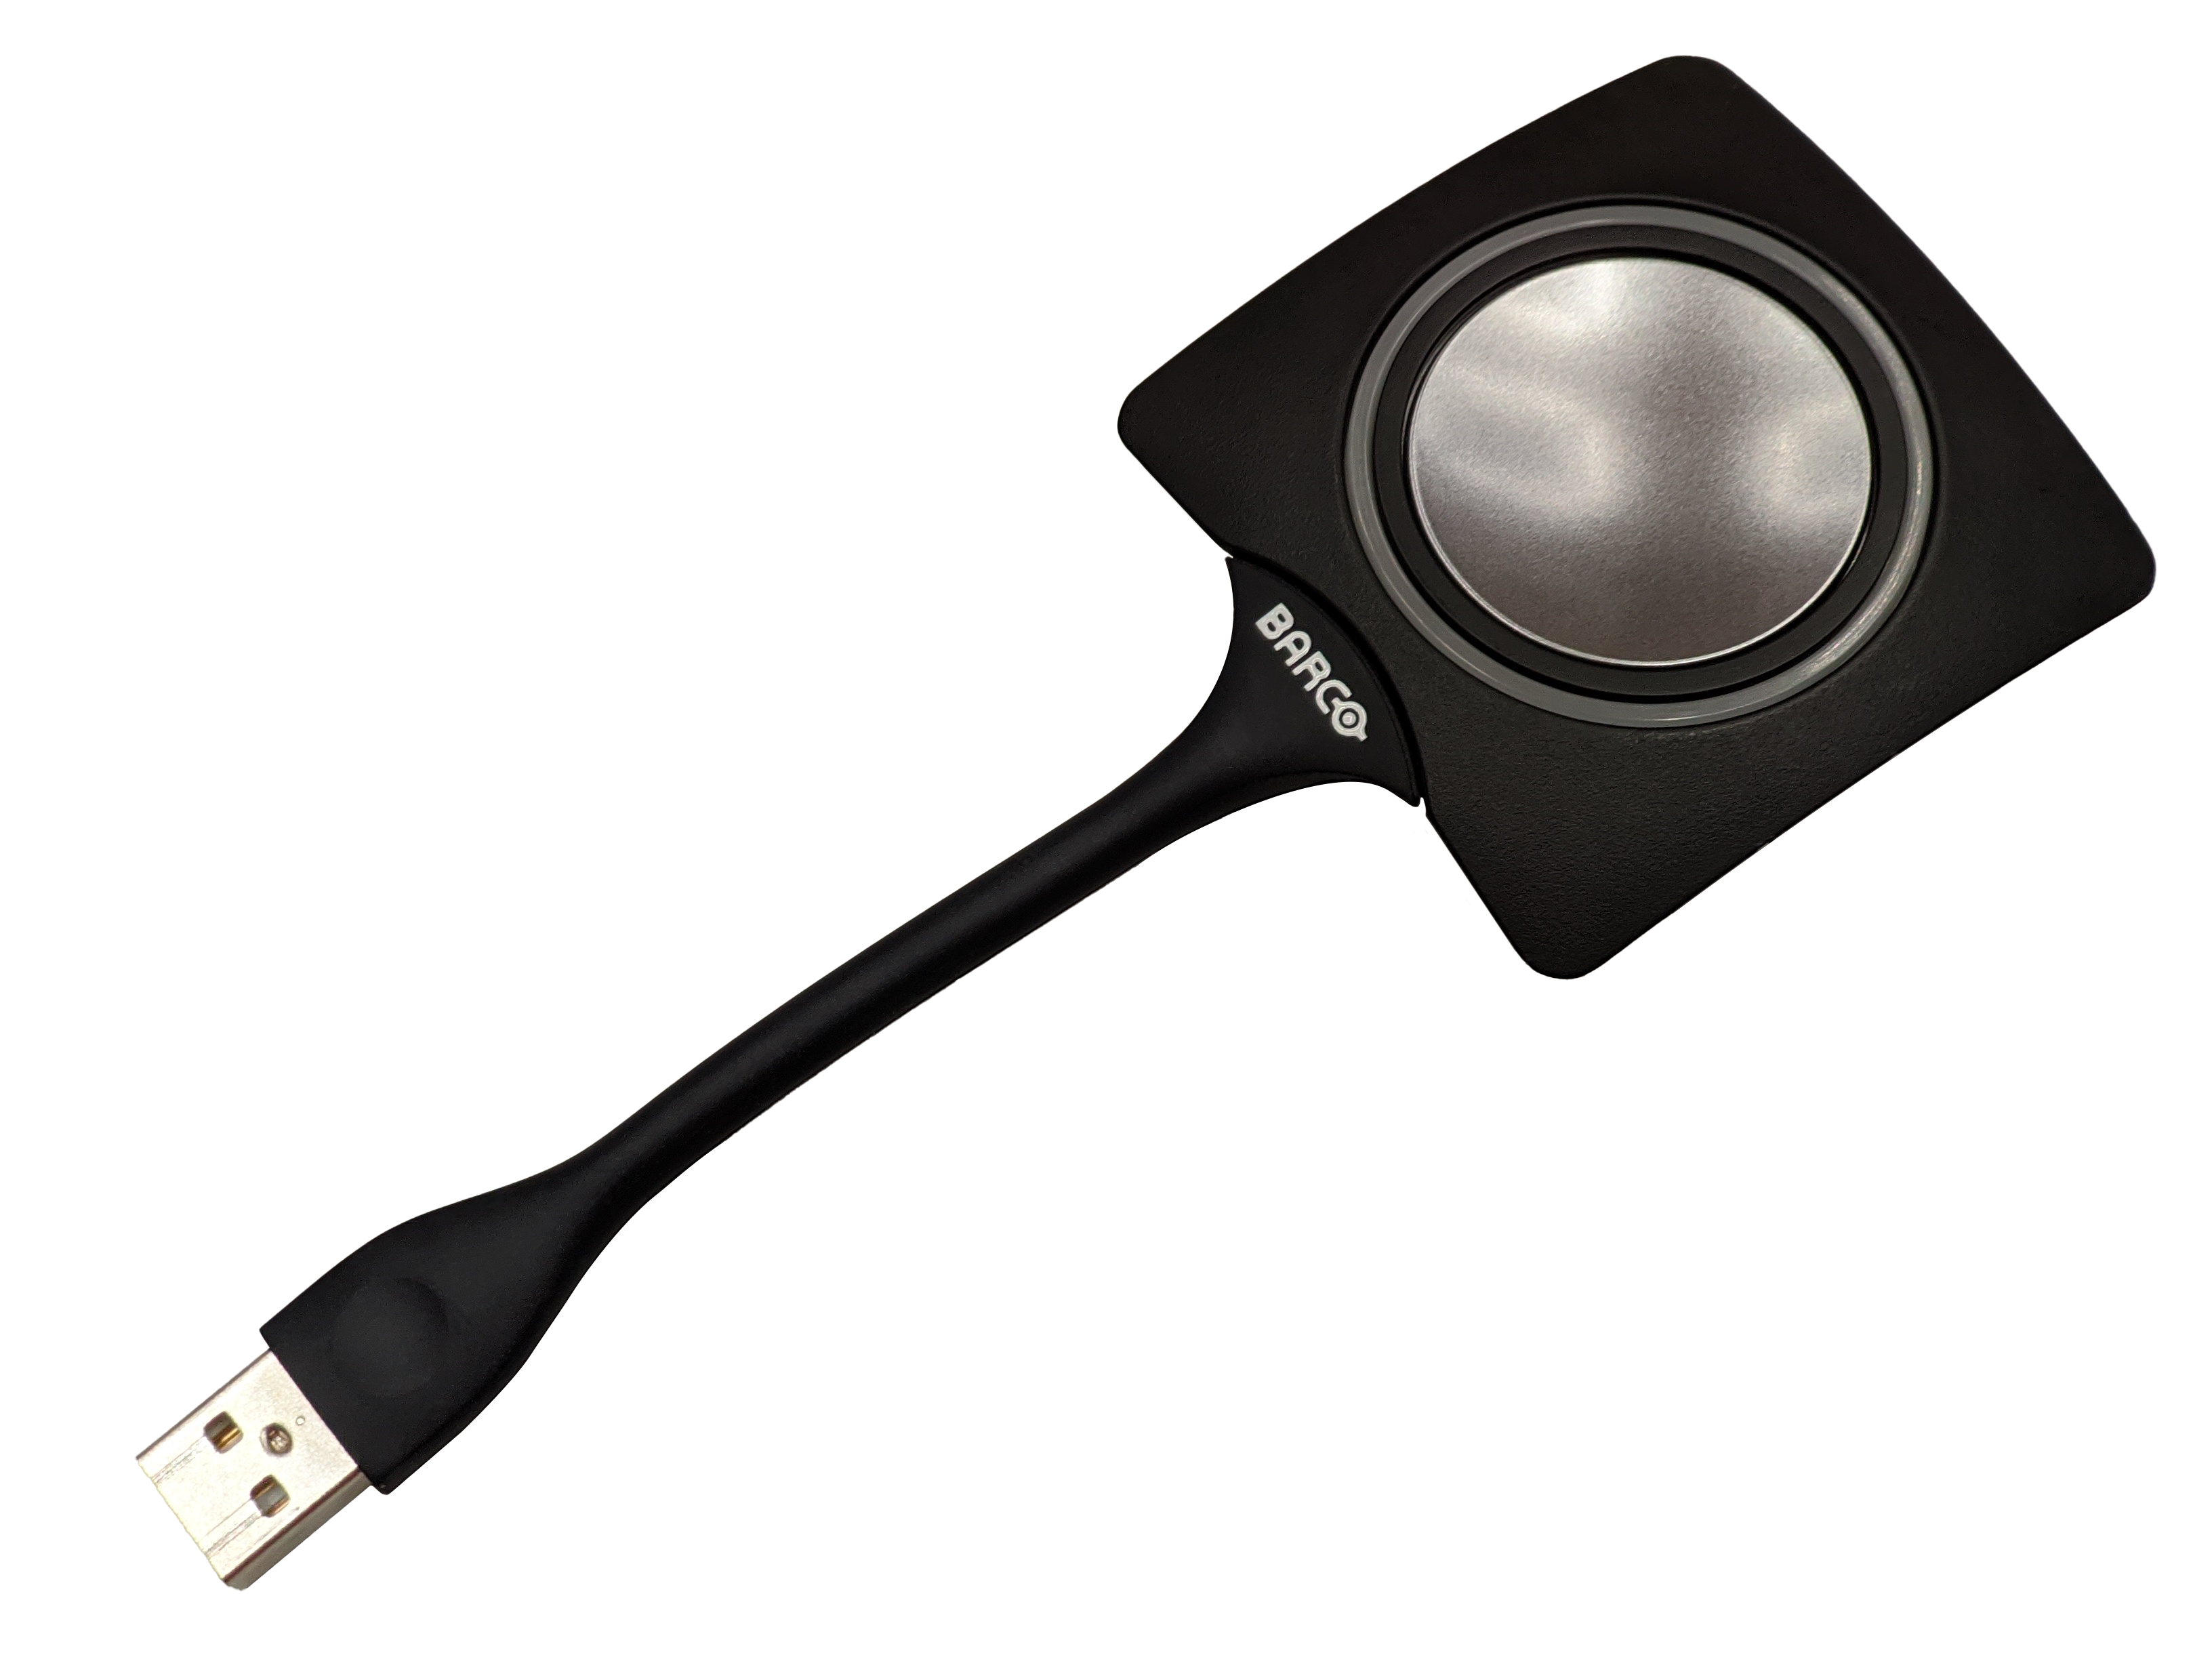
- ClickShare dongle (wireless screen sharing)

After the event, the equipment must be returned to the reception and connected to the appropriate chargers.


Media Control – iPad
The iPad needed for media control is usually in sleep mode. Wake it by pressing the top button or tapping the screen.
To unlock, swipe up from the bottom of the screen.
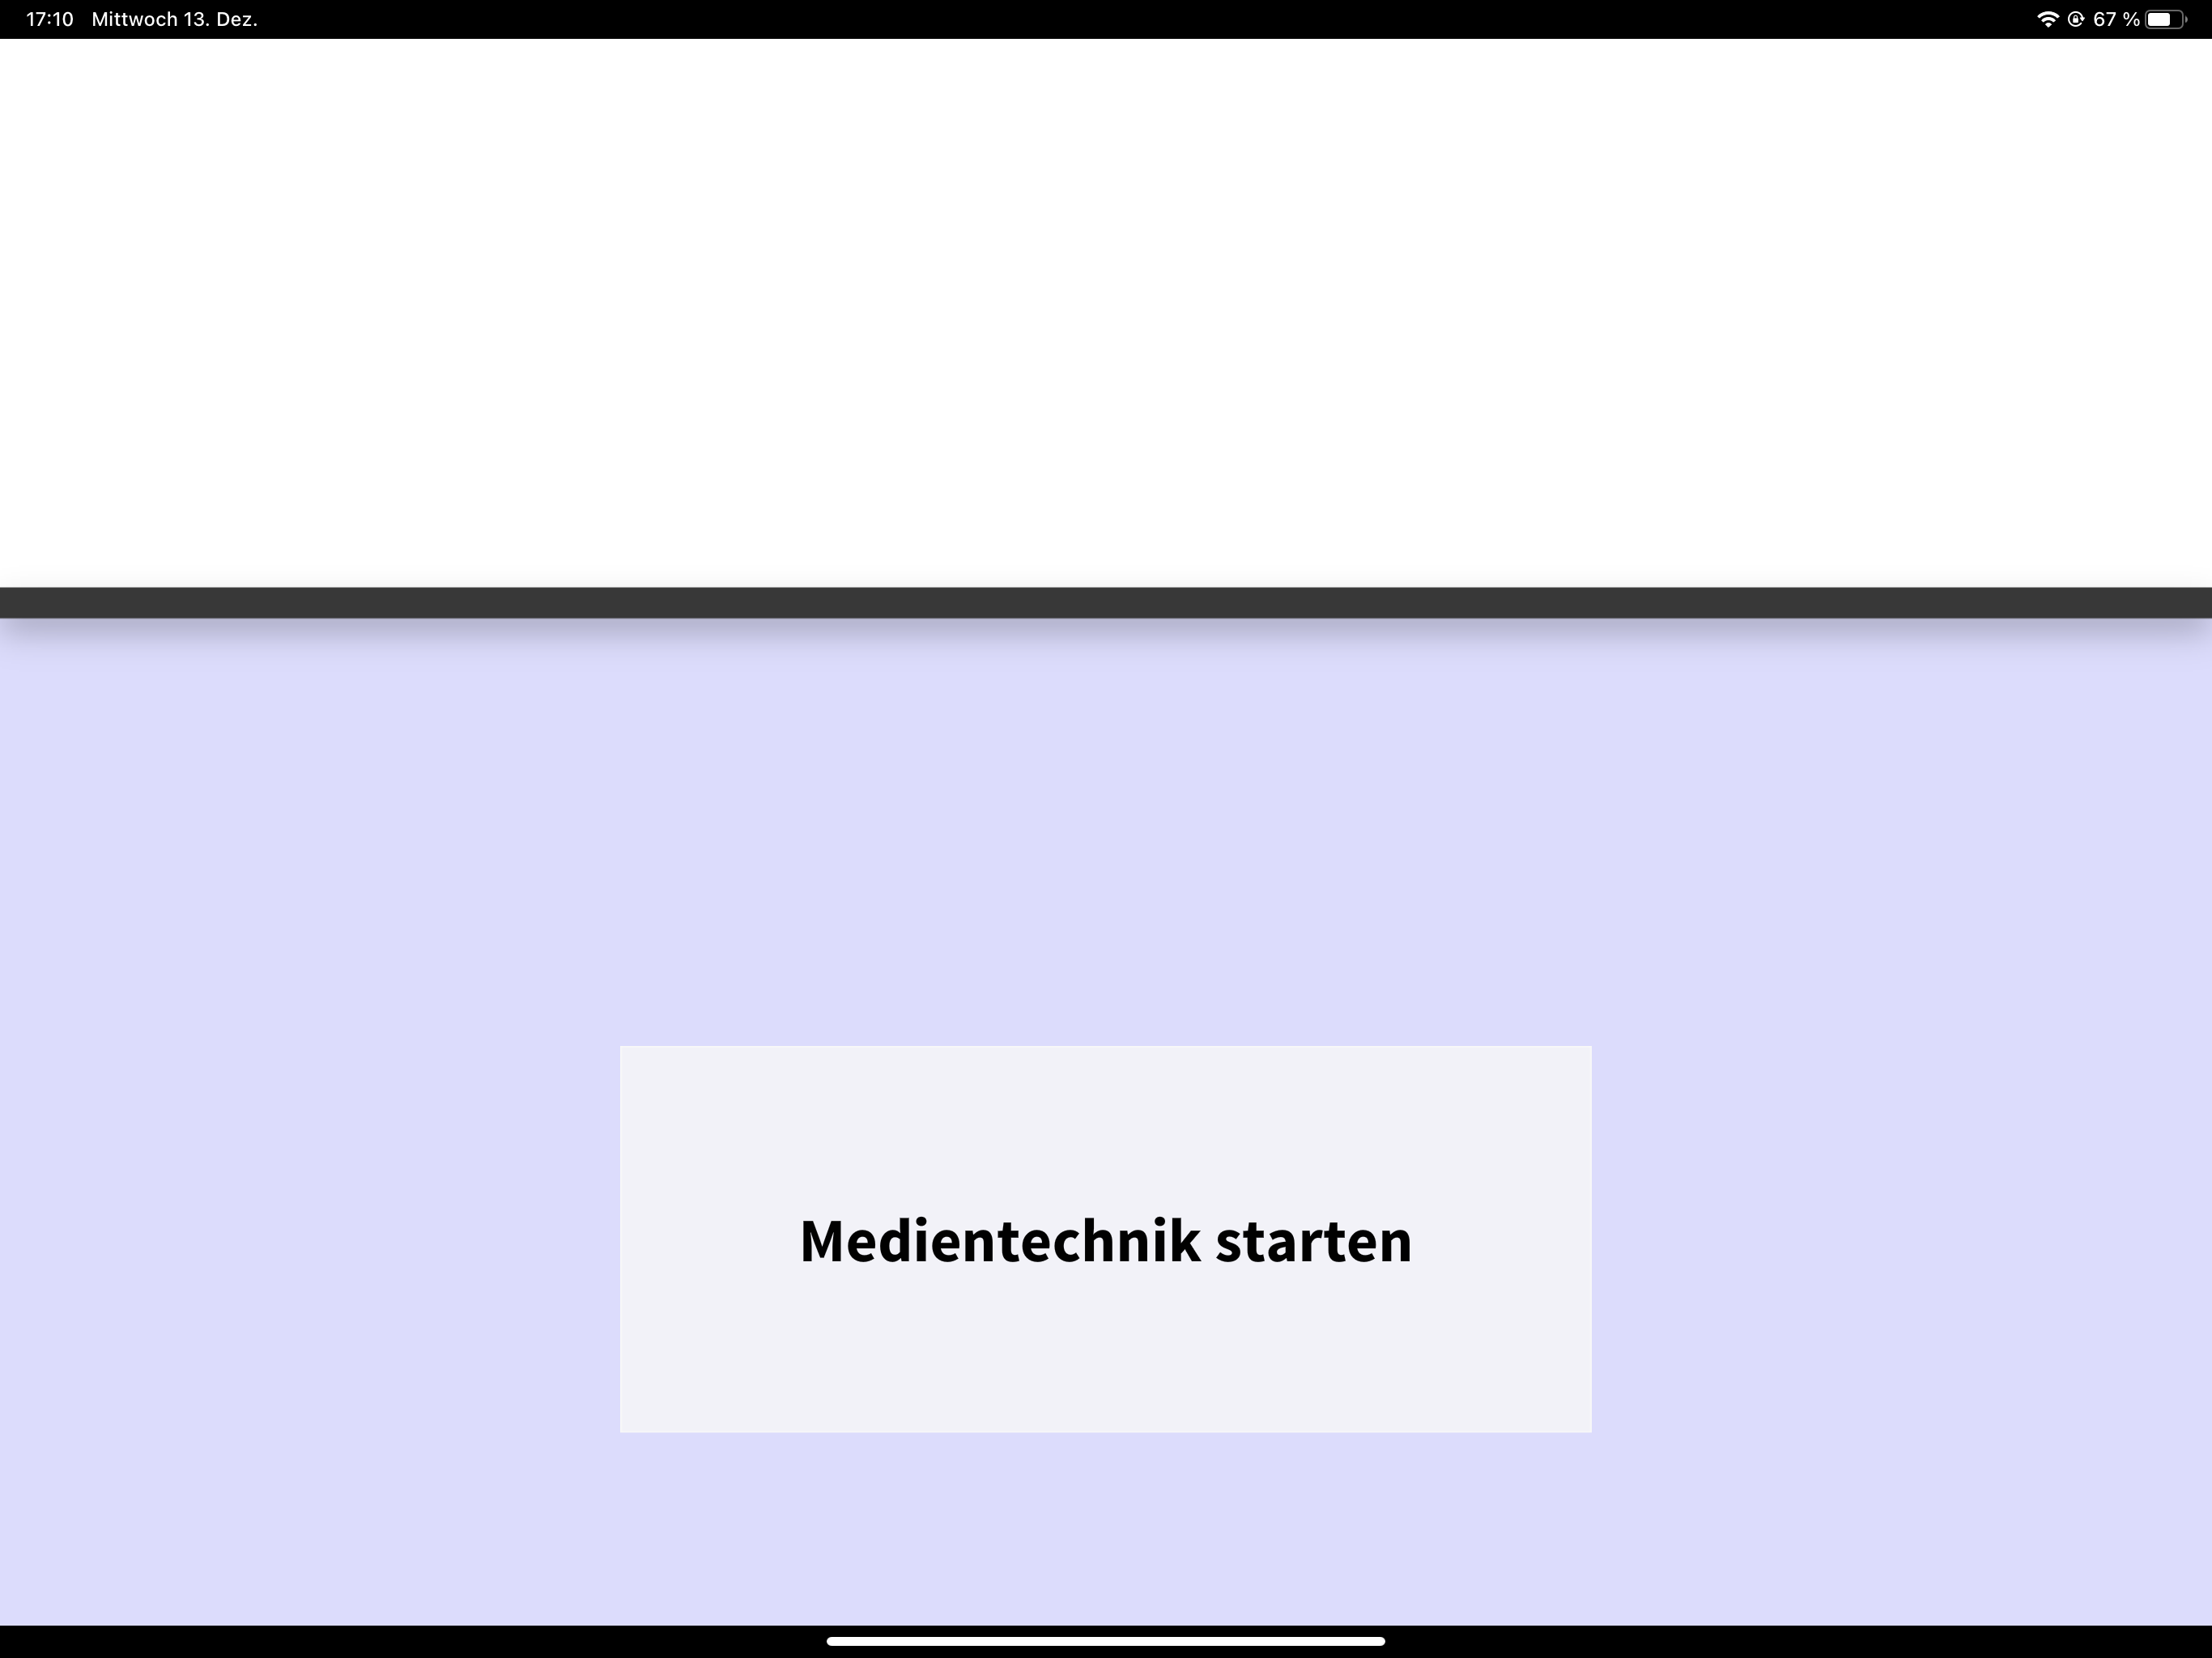
If the media control application is not open, start it by tapping the blue icon labeled “CrestronGo” on the home screen. Then press “Start Media Technology.”
Now press “Start Media Technology”
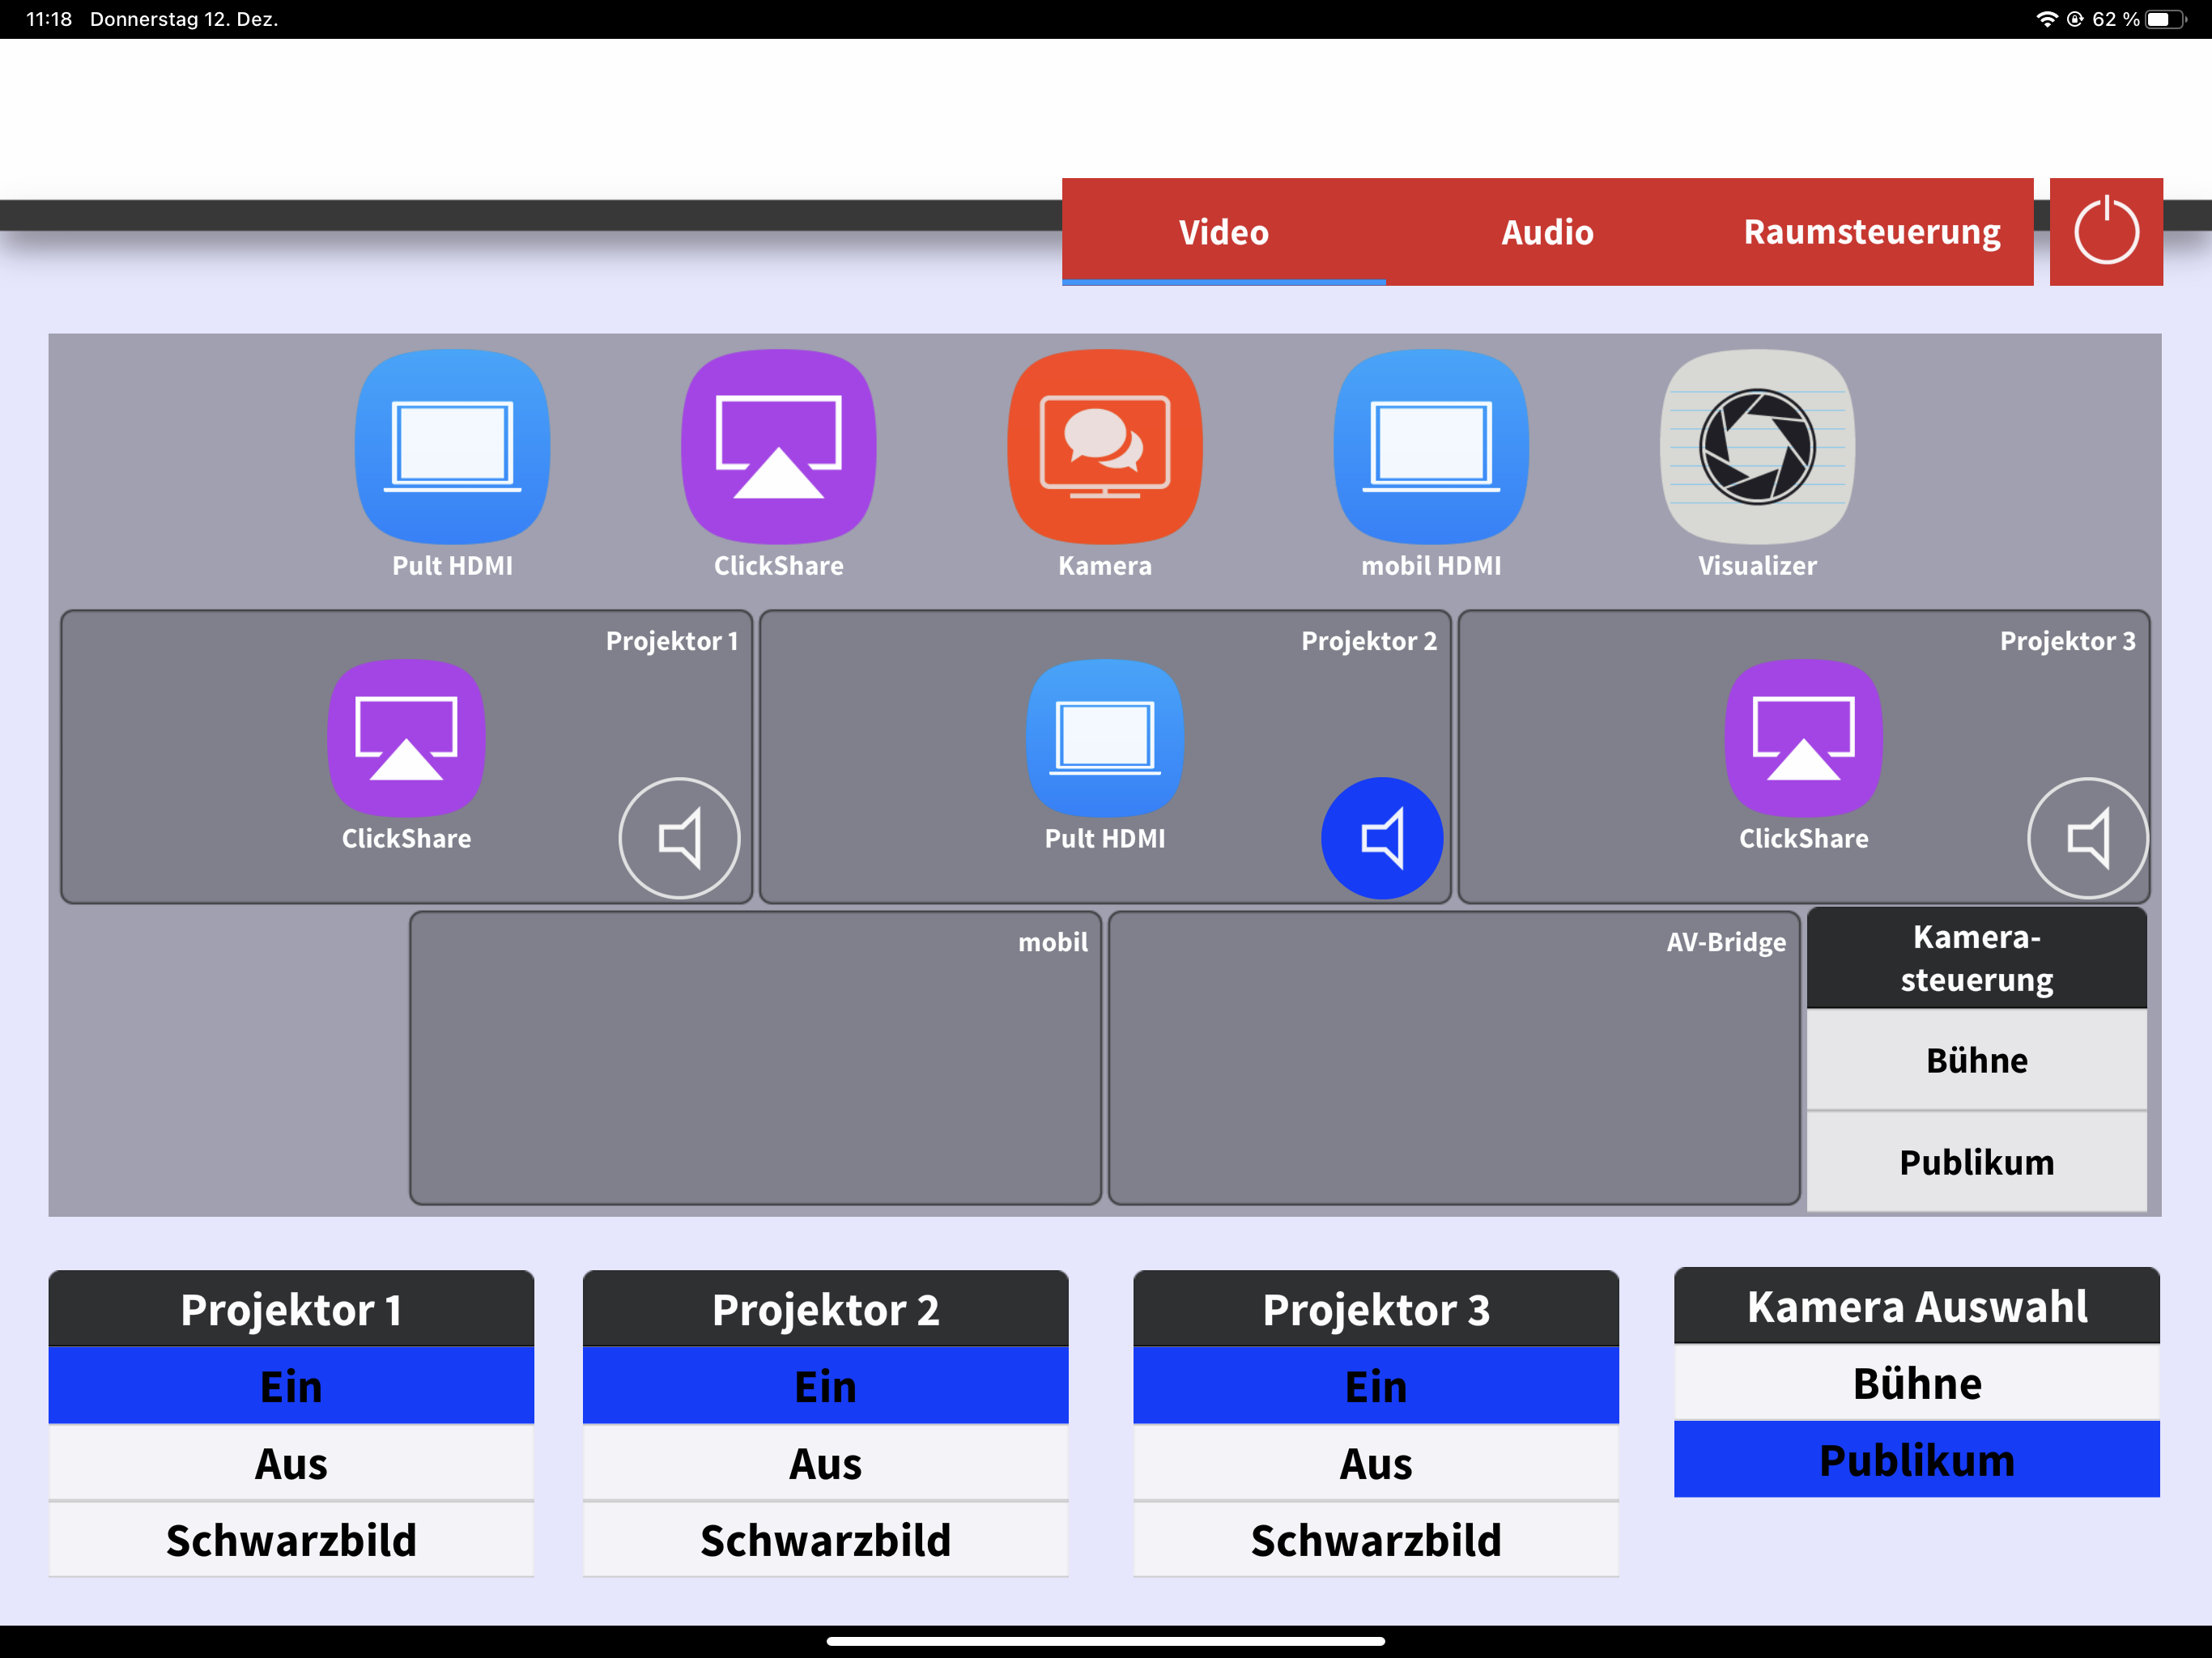
Media Control – Video
Available inputs:
- Podium HDMI
- ClickShare (USB dongle for wireless transmission)
- Camera (image from the selected camera)
- Mobile HDMI (mobile HDMI connection for technician/IT)
- Visualizer (document camera)
- Signal assignment to projector:
- Drag the desired input to the projector field
- Select media sound via the speaker icon
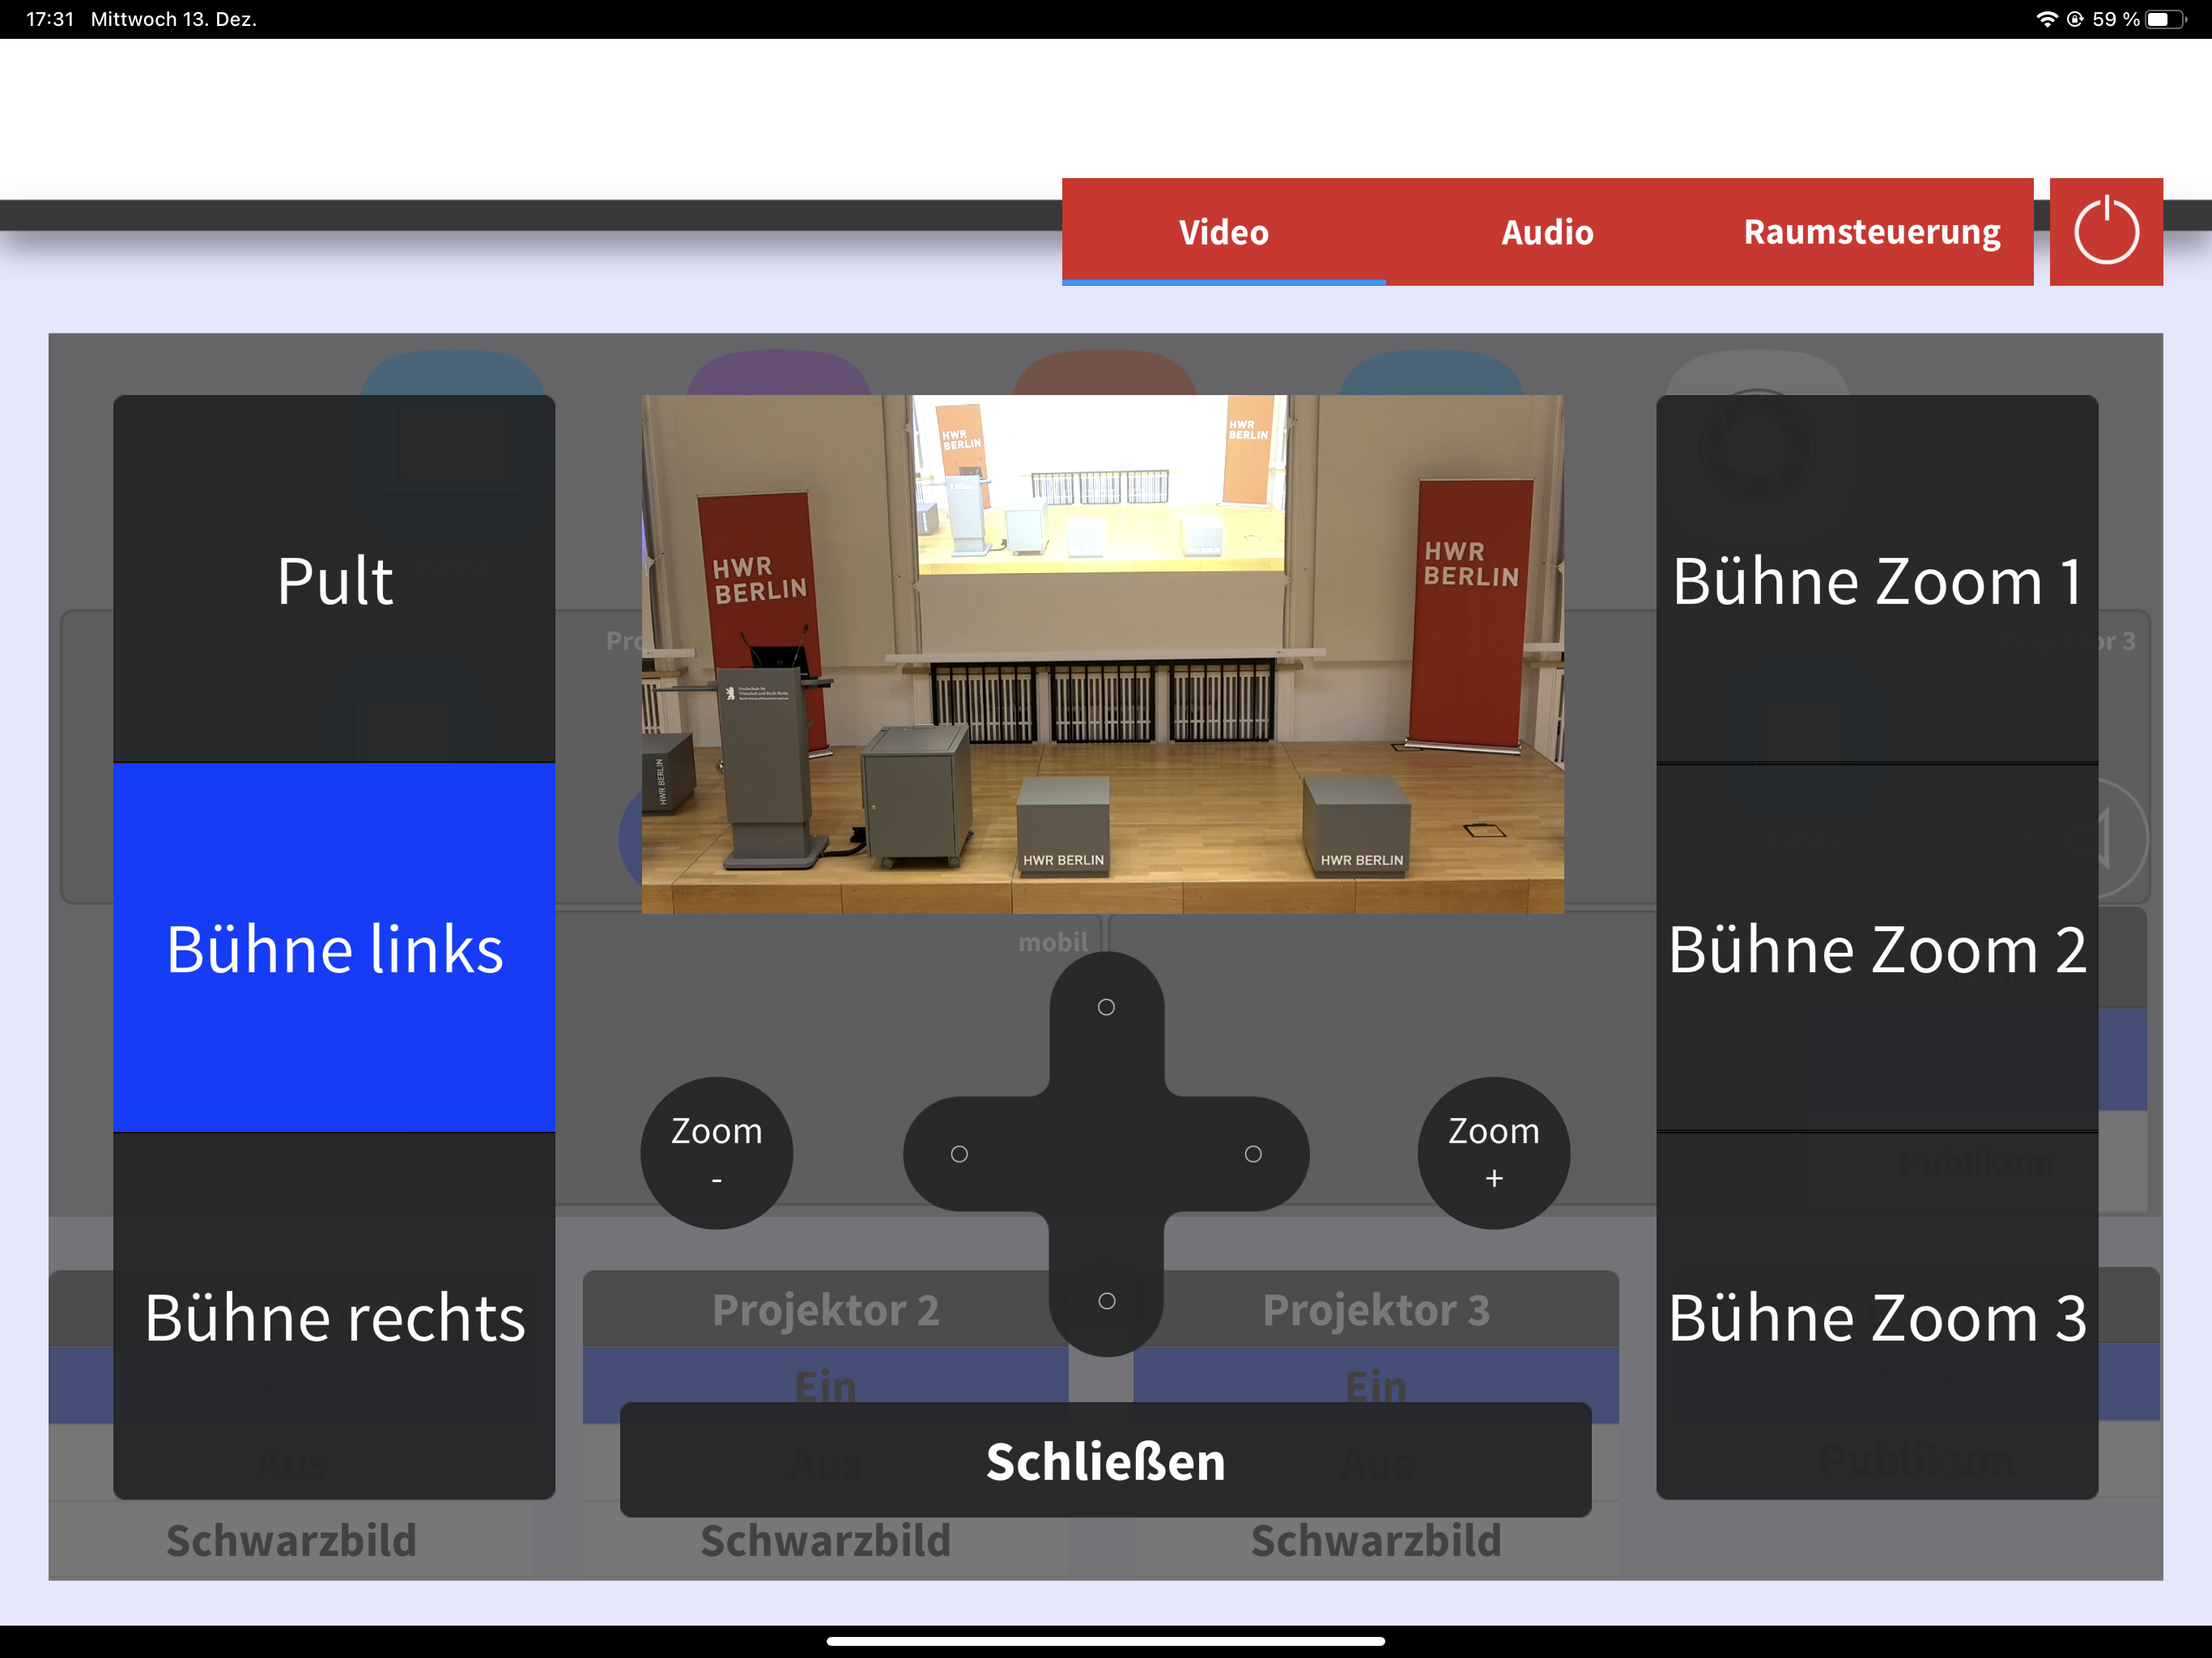
- Camera control:
- Preset selection (predefined positions)
- Manual control (position + zoom)
- Preview image
- Projector / Camera VK:
- Turn projectors on/off
- Black screen (hide image without turning off)
- Camera selection (for video conference/as input)
In the first tab “Video,” you configure the projectors, select the video signal to be transmitted, and choose the camera. The latter is used for online streaming in hybrid events, but it can also be projected onto the screens if desired.
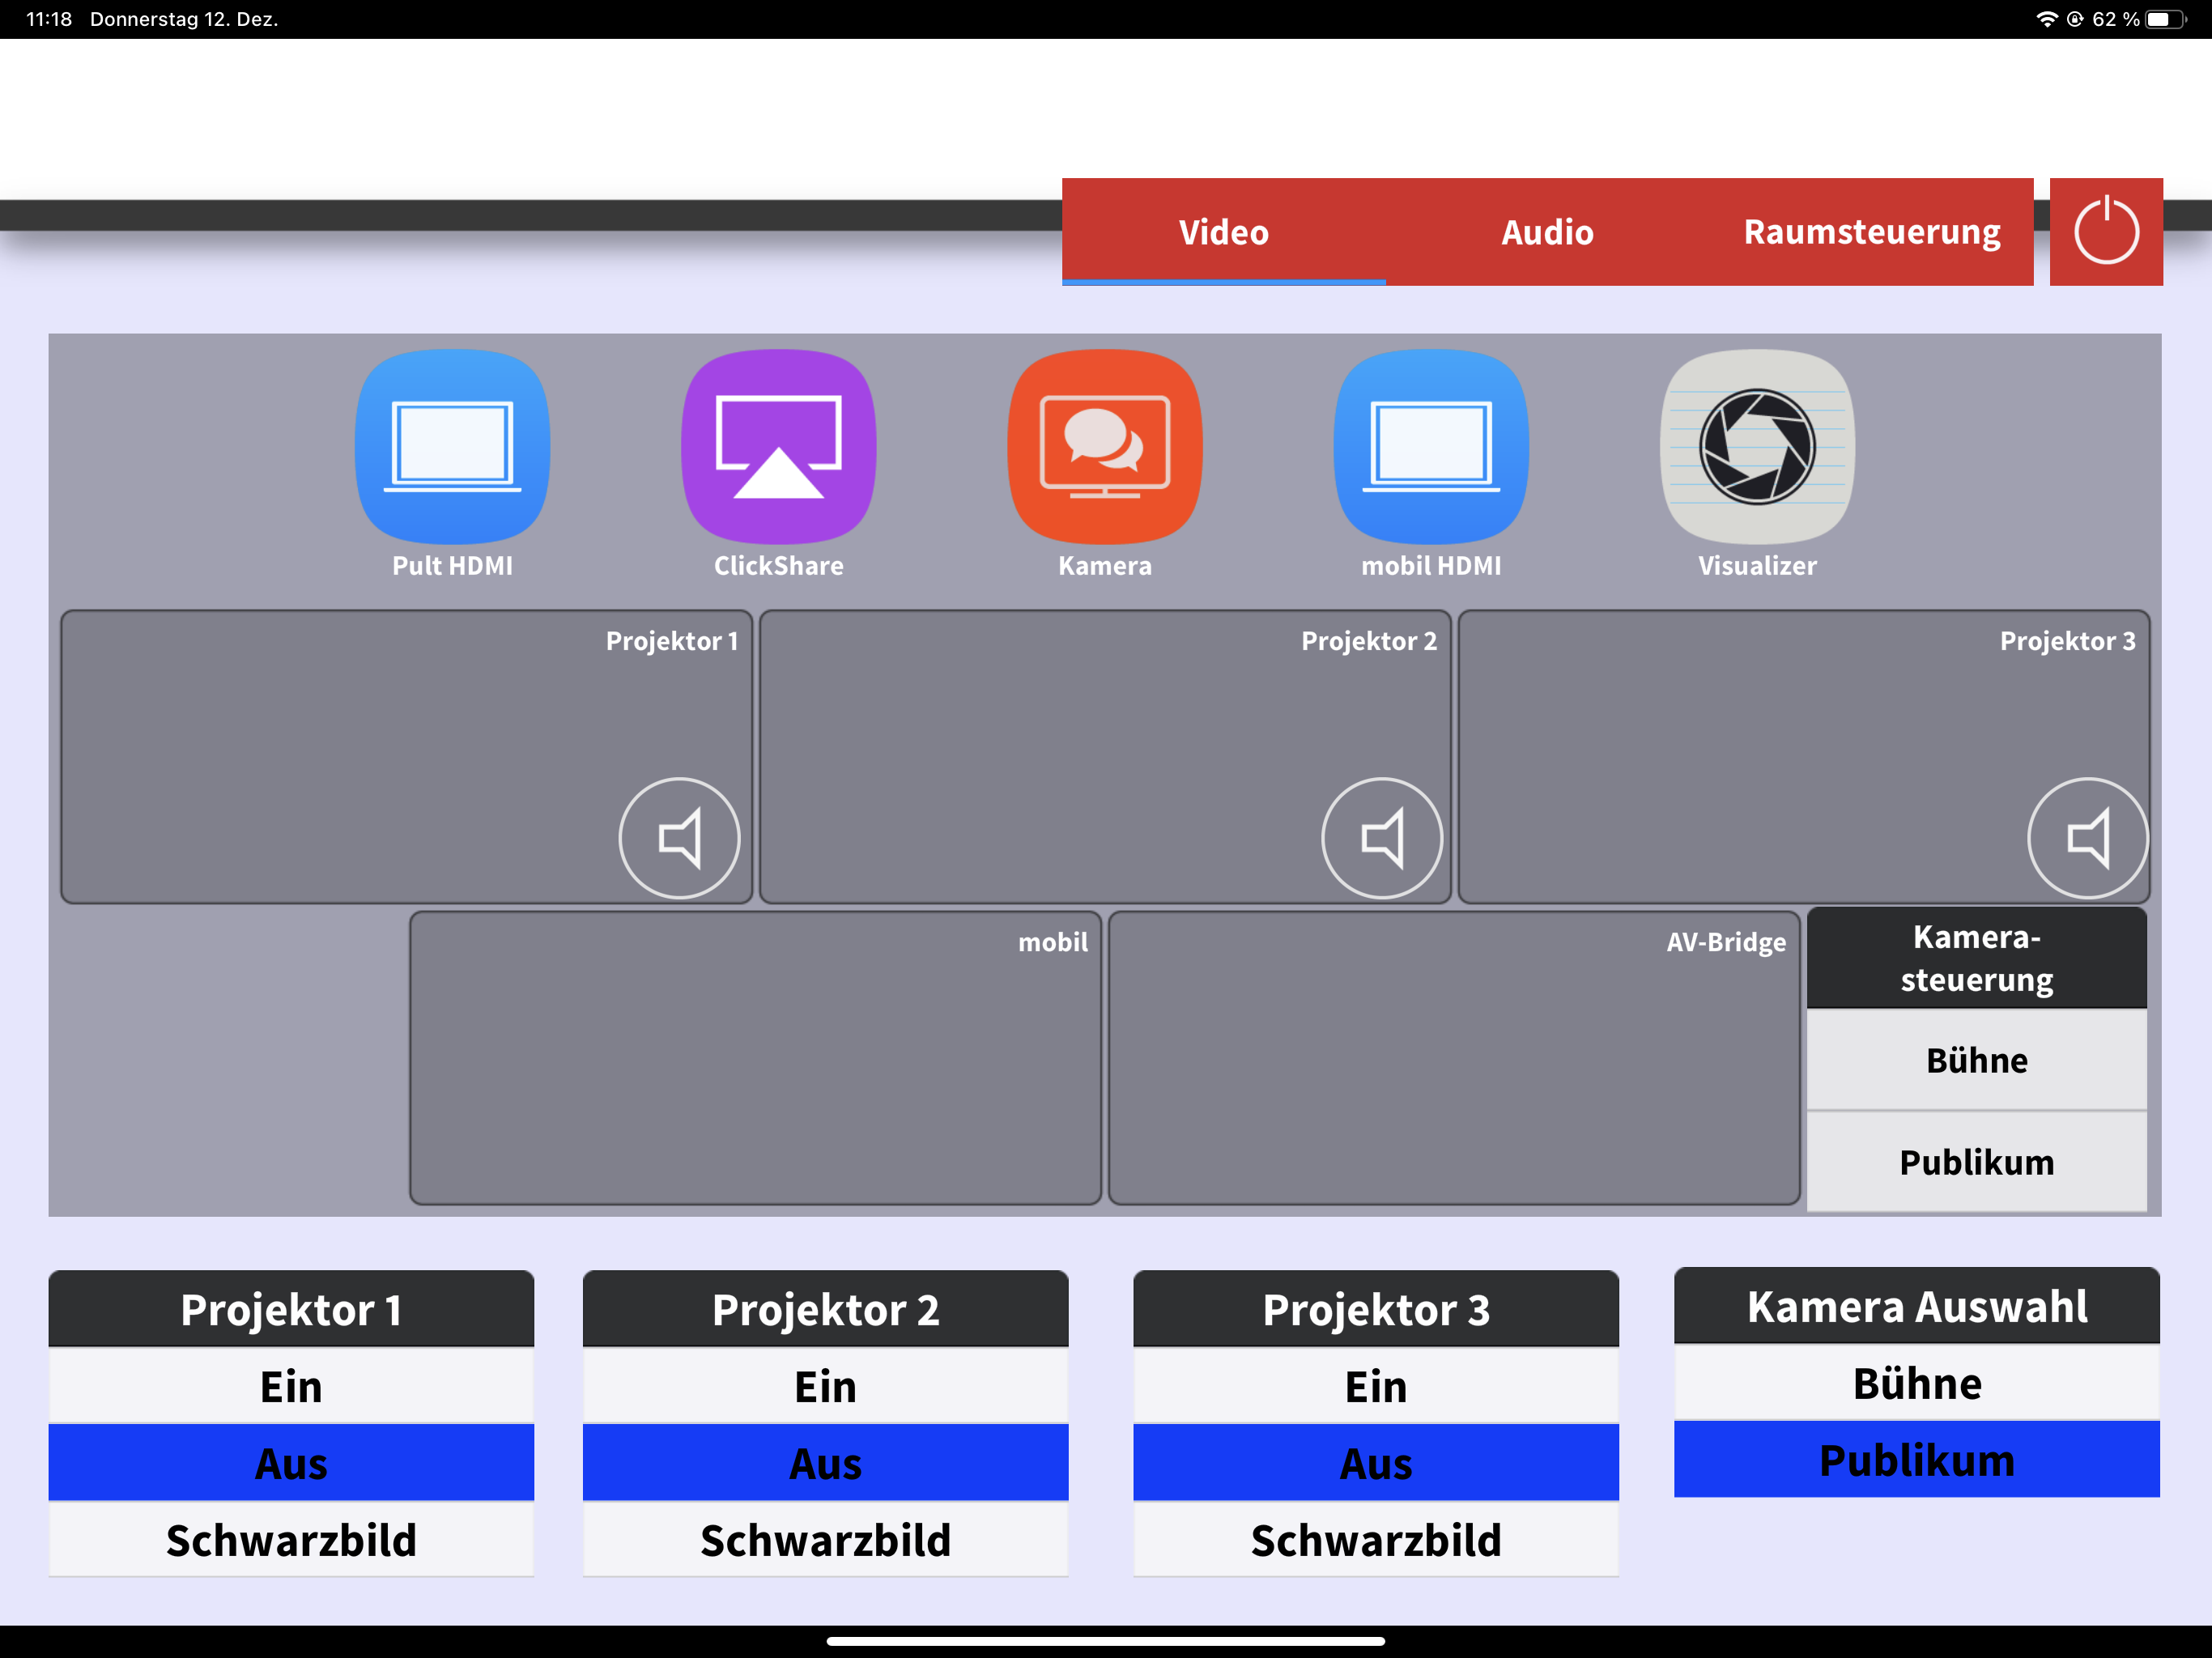
Drag and drop the desired video signal from the first row to the required projectors in the second row. For example, if you’re using only one laptop connected to the HDMI port from the podium, drag the “Podium HDMI” icon to the respective projectors and turn them “On” accordingly.
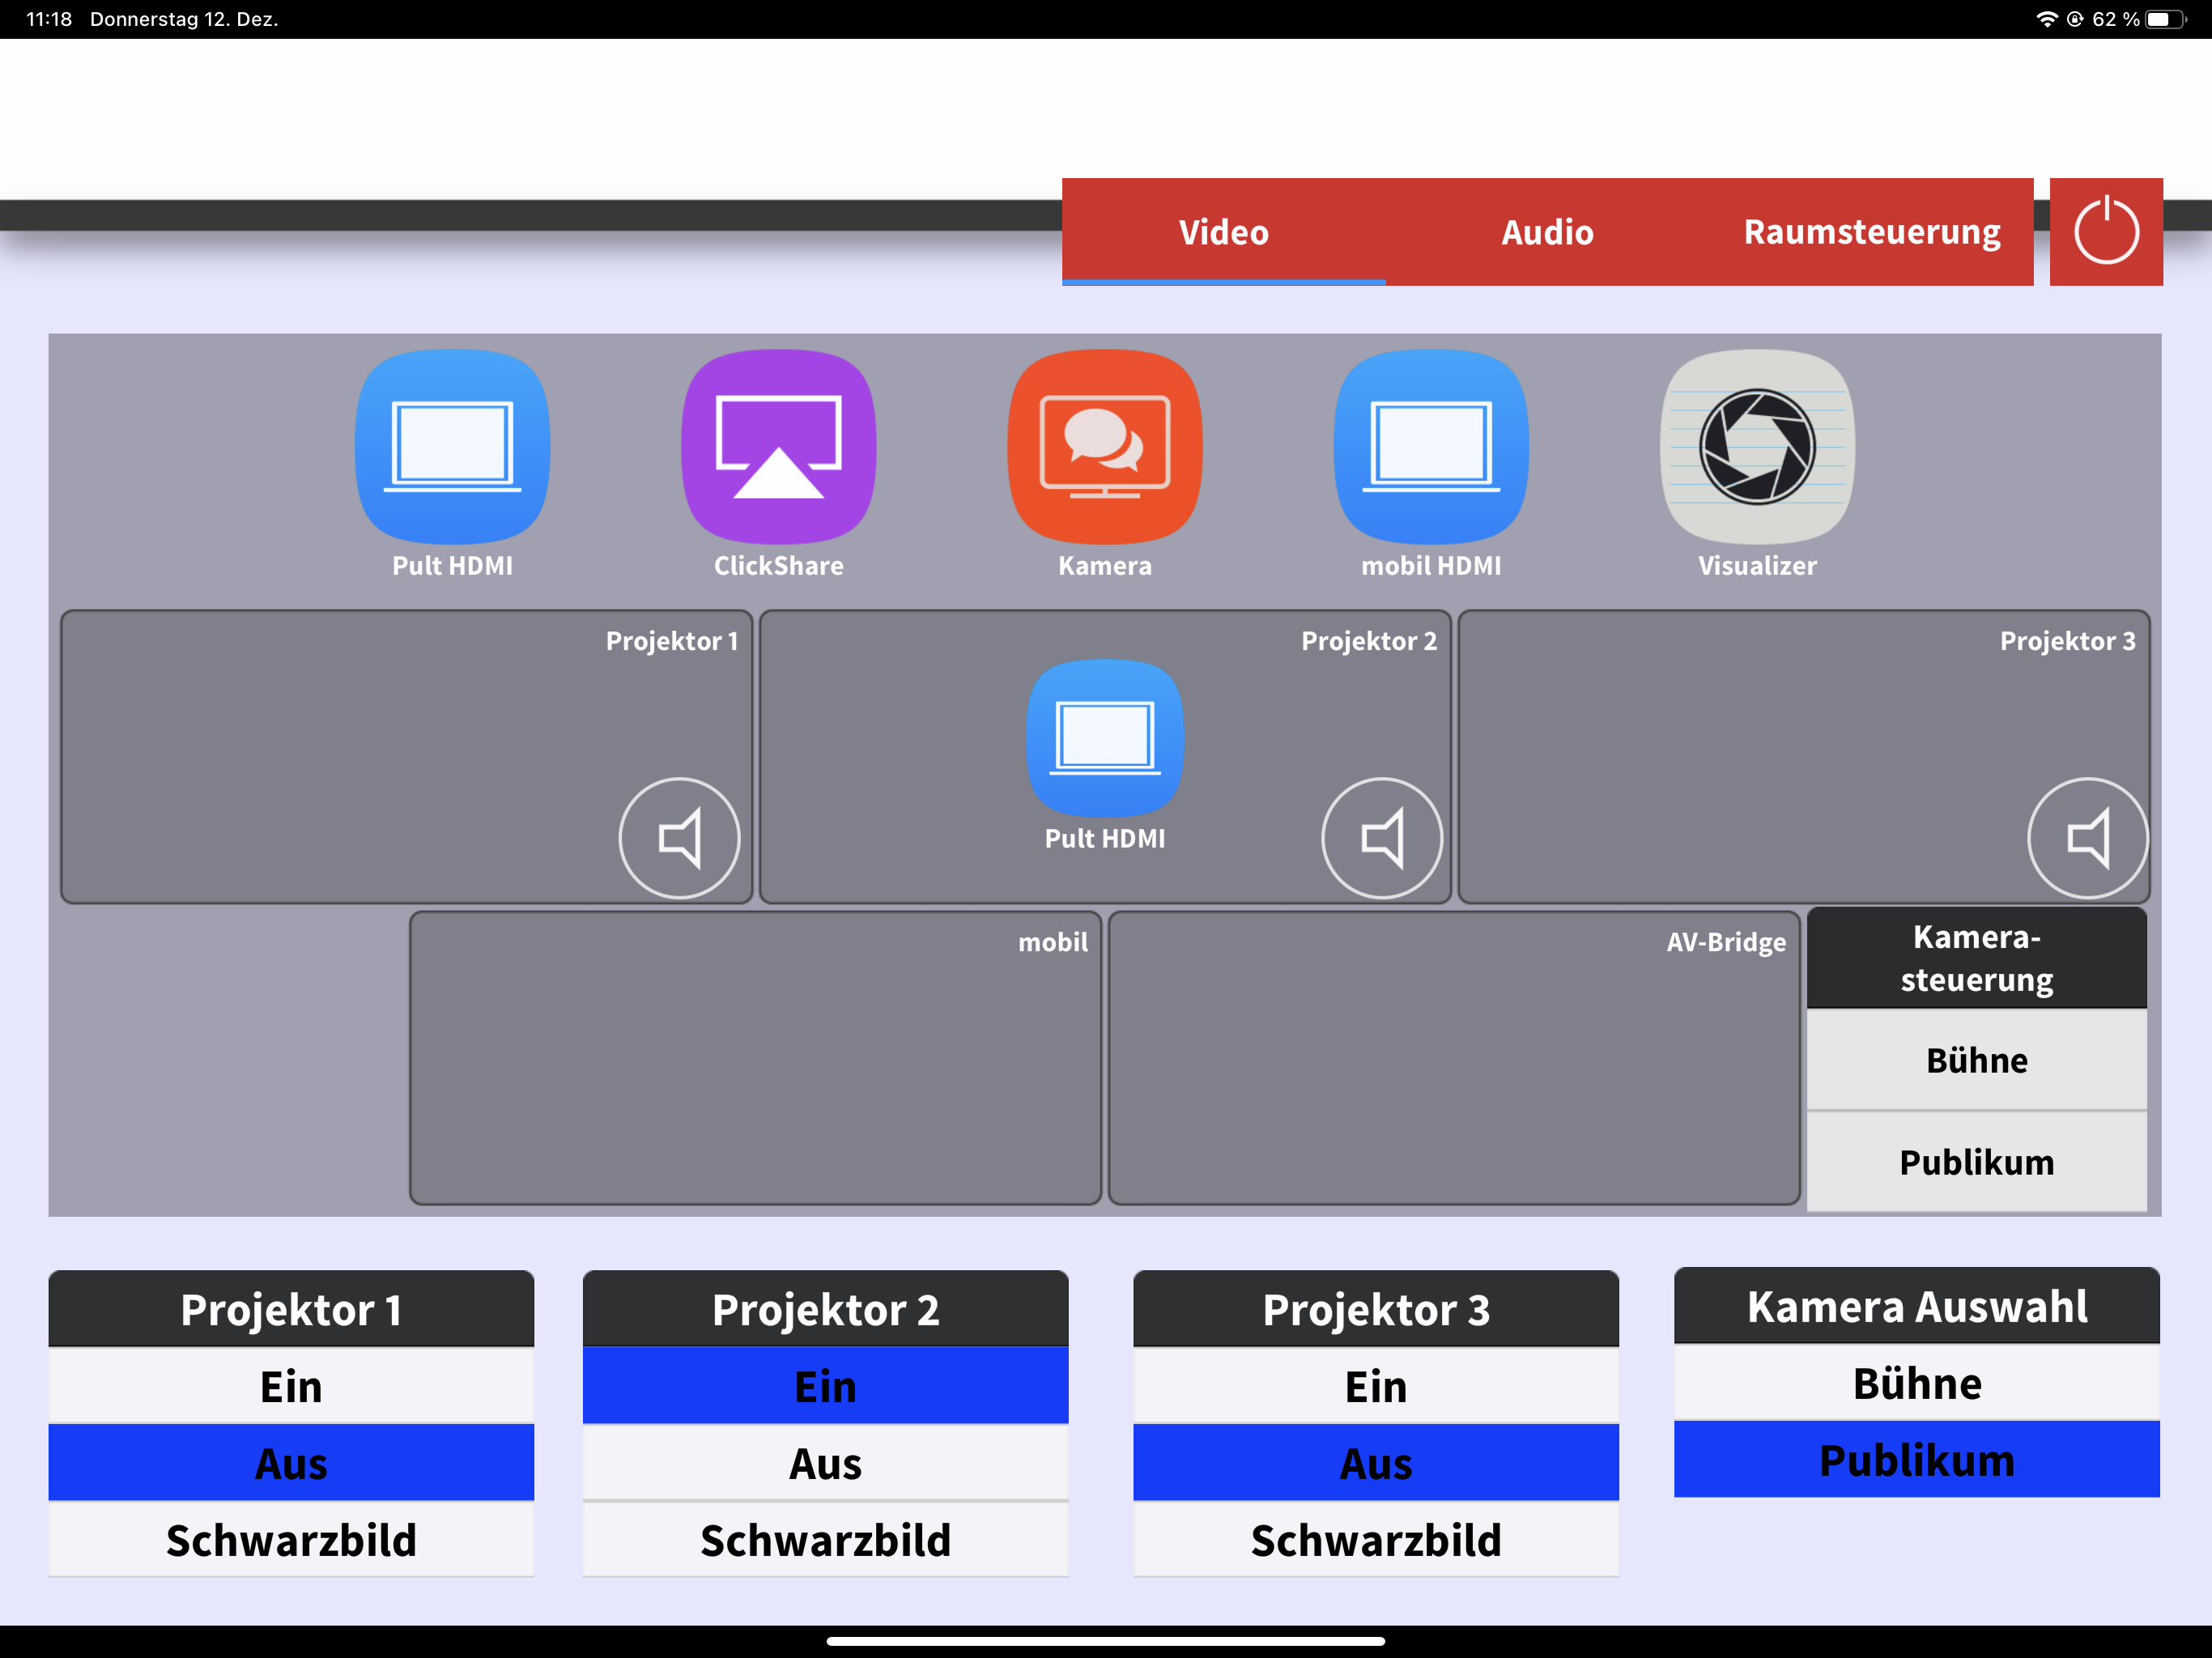
If you want to transmit different video signals to the projectors, connect the ClickShare dongle via USB to another device. Then, drag the “ClickShare” icon from the first row to the desired projector.
The selection of the audio signal is done by clicking on the speaker icon next to the projectors in the second row. In this example, the sound from the device on the podium connected with the HDMI cable is used.
Media Control – Camera
Through the “Camera Control” in the third row, you can select either a predefined position (Preset) for the camera directed at the audience or stage or manually adjust it using the middle controls.
The “Camera Selection” sets the camera to be used, which can be displayed on the projectors via the “Camera” input or shared as a webcam in a video conference with a USB-connected laptop. In the latter scenario, the audio sources released in the “Audio” tab will also be transmitted.
Media Control – Audio
In the second tab, “Audio,” you configure the transmission of audio signals. These are used for online streaming in hybrid events but can also be employed for projection onto the screens as needed.
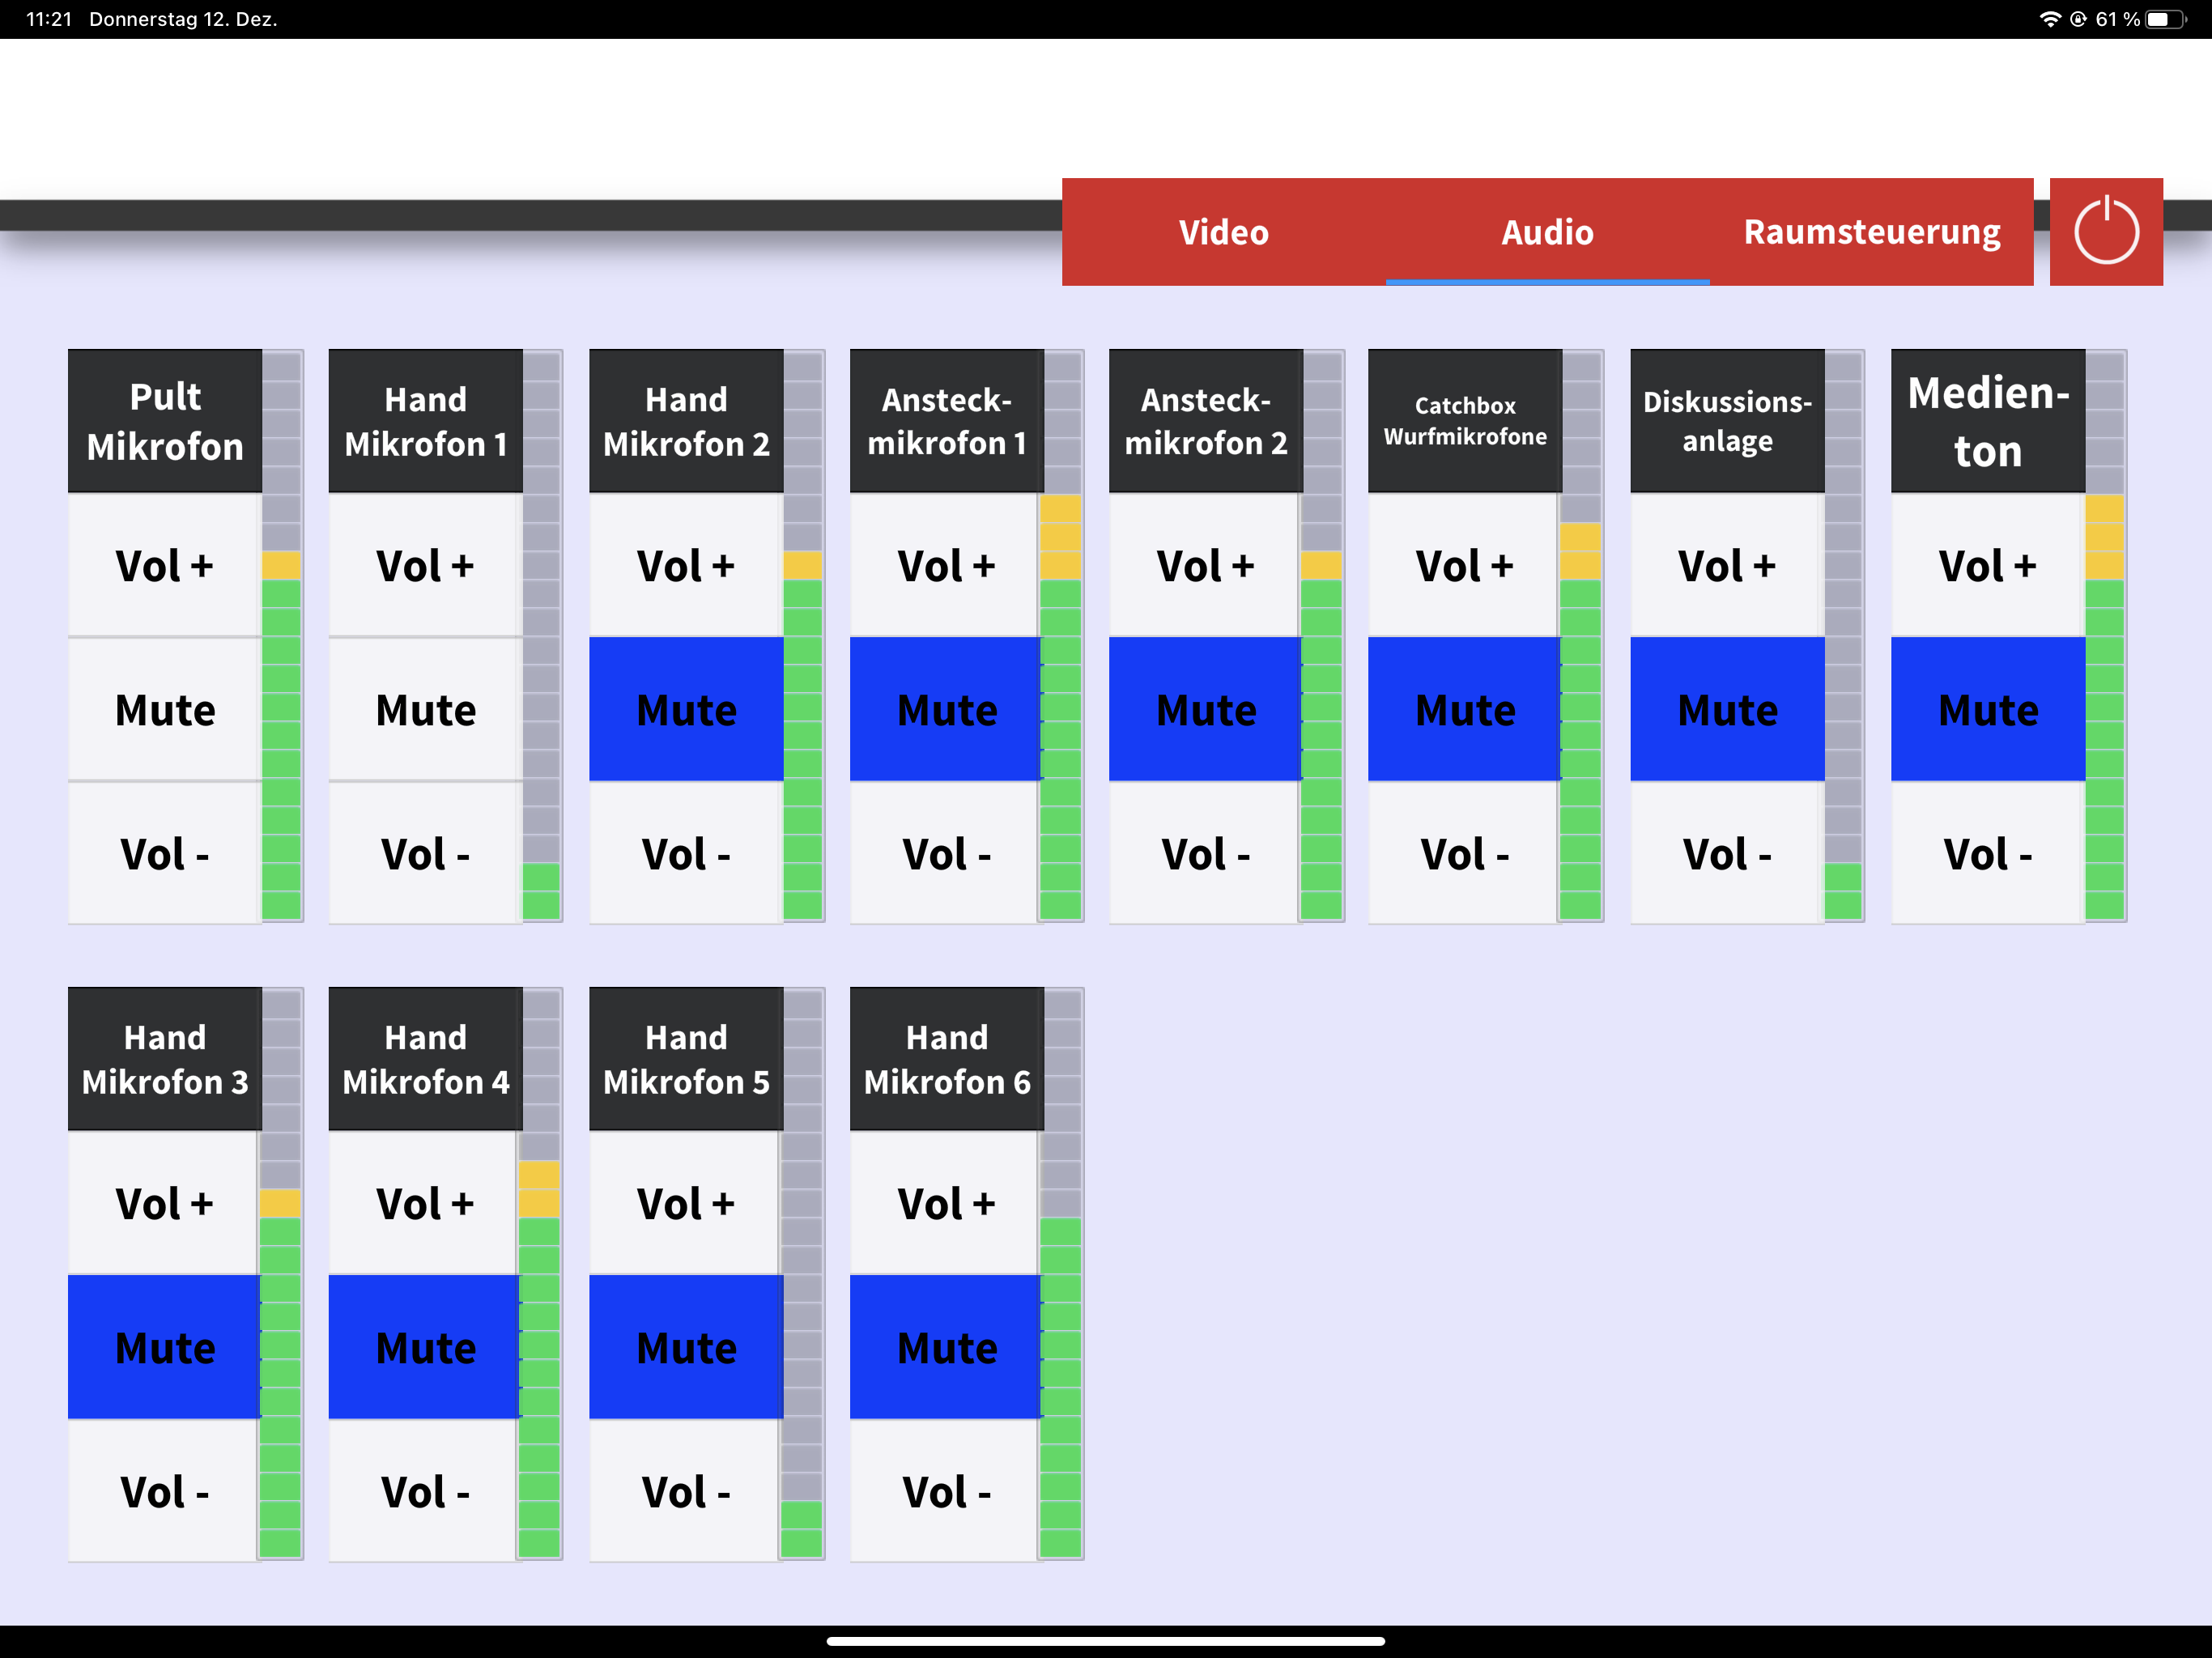
Using “Mute,” you can activate or deactivate the muting of audio sources. Volume control for individual sources is handled through “Vol +” and “Vol -“. To prevent distortion or microphone echo, ensure that the volume is not set too high.
In the shown example, the podium and one of the handheld microphones are active, while all other sources are muted. For audio playback from a connected laptop, enabling the media sound is necessary.
Contents
See also
-
Audiovisual Media Service
-
Auditorium Campus Schöneberg
-
Blended Classroom
-
Digital Examinations
-
Digital Pinboard (Taskcard)
-
Digital Whiteboard (Collaboard)
-
HAWKI (Gen. KI)
-
Interactive Presentations (Mentimeter)
-
Learning Management (Moodle Cooperation)
-
Learning Management (Moodle)
-
Media Platform (ViMP)
-
Mobile Hybrid Teaching Sets
-
Online Surveys (Limesurvey)
-
Online Surveys (Unipark)
-
Online Translation Service (DeepL)
-
Plagiarism Detection (Turnitin)
-
Subtitling of Videos (Subtitle Edit)
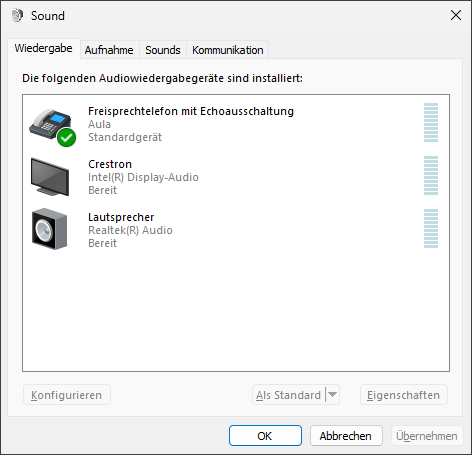
Media Control – Laptop Audio
To play the media sound from a connected laptop, the appropriate playback device must be selected in the sound settings of the operating system or the video conferencing system.
For online streaming or a hybrid event, the USB cable on the podium must be used, and “Aula” (or “AV Bridge 2×1”) should be selected.
If only the HDMI cable on the podium is used (e.g., for an in-person event), then “Crestron” or “Intel(R) Display Audio” should be selected.
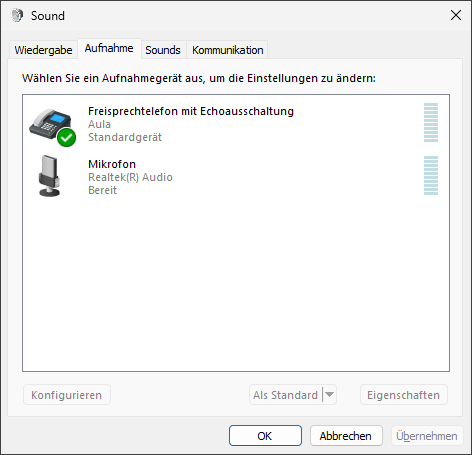
- Selection of recording/playback devices (Microsoft Windows):