The following article explains how to install and set up the AVAYA IX Workplace software for business telephony on your Android smartphone.

The requirement for business telephony via PC and smartphone is a license assignment by the phone administrator, which must be requested through the department heads.

Use of the client with an active eduroam connection:
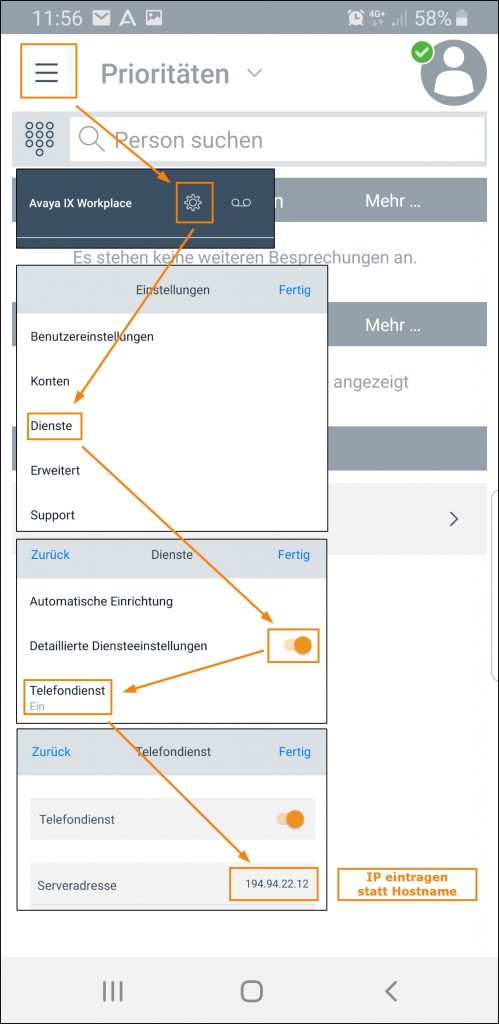
After each app restart, the last configuration step must be repeated, and the server address must be set to 194.94.22.12.
Settings of AVAYA IX Workplace
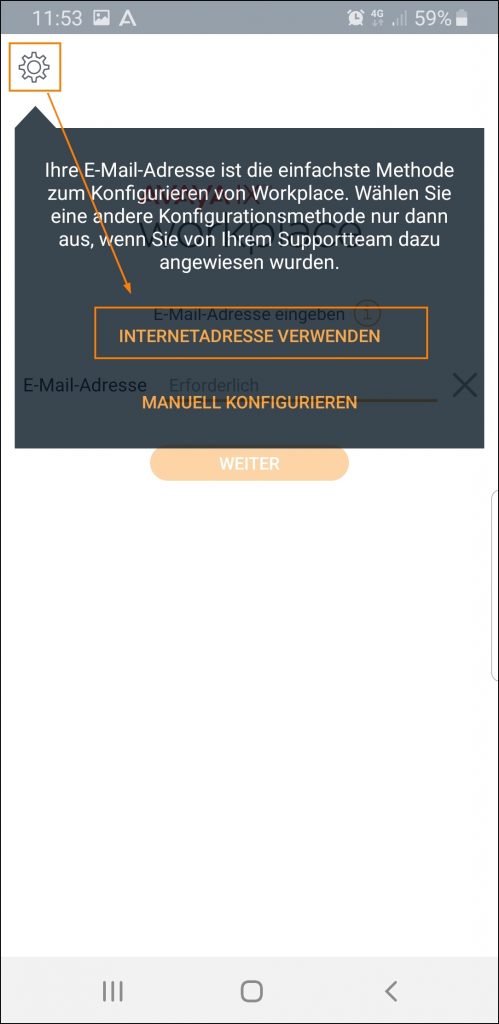
Open the AVAYA Workplace app and click on “Configure My Account”.

Click on “Use Internet Address”, enter the URL http://194.94.22.12:8411/46xxsettings.txt, and click “NEXT”.
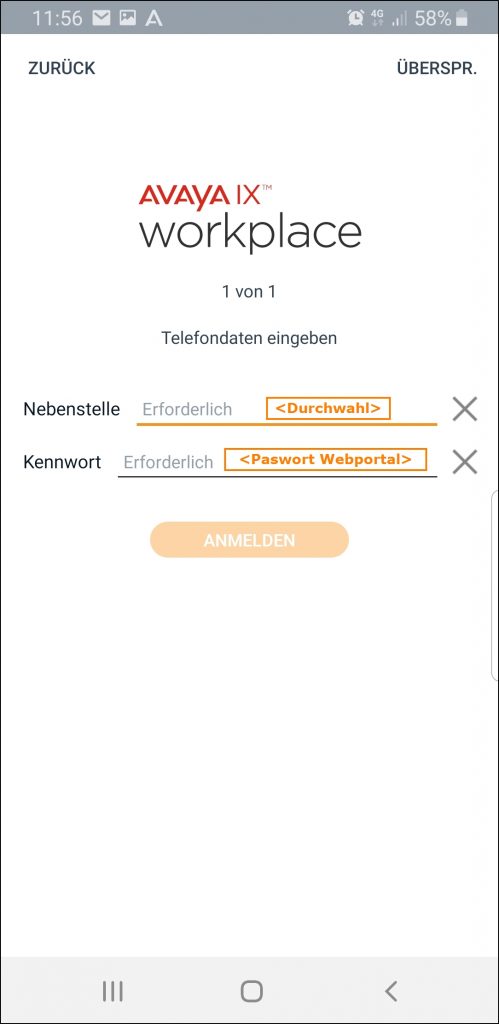
Enter your extension under “Nebenstelle” and your password (the one you set via the AVAYA Portal) under “Kennwort”.
As a new HWR member, you will initially receive a password assigned by the phone admin via email, which you must change upon your first login to the AVAYA Portal.
After entering your extension and password, click on “Log In”.
Check the following settings via the menu –> Services:
You can now make calls using your business number with the Avaya Workplace app and be reached through it as well.
Guides about Telephone
Telephone Admin
☏ +49 30 30877 1298
✉ telefon-admin@hwr-berlin.de