The following article explains how to install and set up the AVAYA IX Workplace software for business telephony on your computer.

The requirement for business telephony via PC and smartphone is a license assignment by the phone administrator, which must be requested through the department heads.
Installation of AVAYA IX Workplace
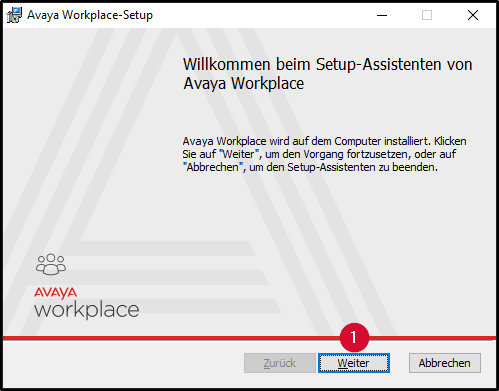
Start the installer and click “Next.”
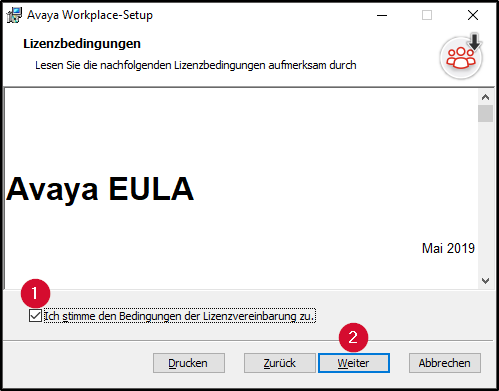
Agree to the license agreement and click “Next.”
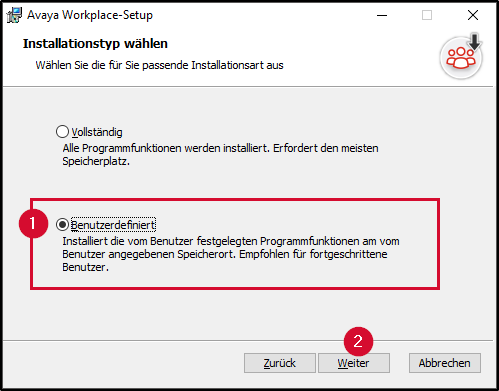
Select the installation type “Custom” and click “Next.”
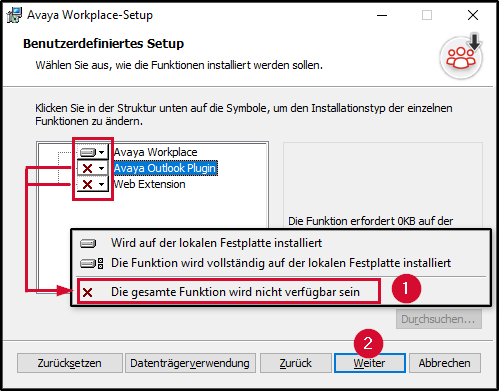
The functions “Avaya Outlook Plugin” and “Web Extension” are not available and cannot be installed. Click “Next.”
Settings of AVAYA IX Workplace
Open the AVAYA IX Workplace program and:
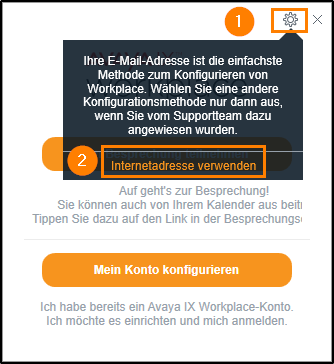
- Click on the gear icon.
- select “Use internet address.”
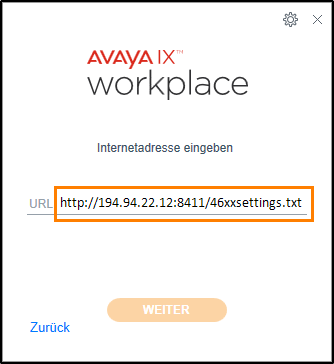
Enter http://194.94.22.12:8411/46xxsettings.txt in the URL field and click “NEXT.”
Enter the following:
- Extension: your direct dial number
- Password: the password you selected via the AVAYA Portal
*As a new HWR member, you will initially receive a password assigned by the phone admin via email, which you must change upon first login to the AVAYA Portal.
After entering the extension and password, click “NEXT.”

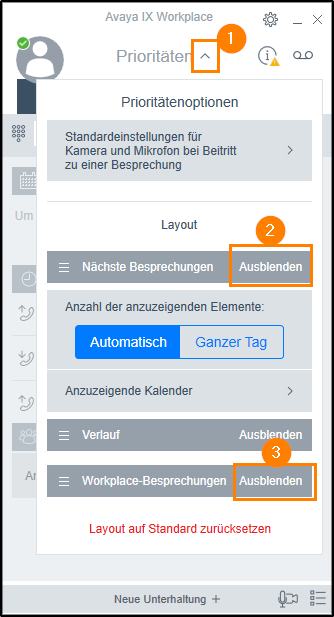
Hide the priority options by clicking on 1., 2., and 3..
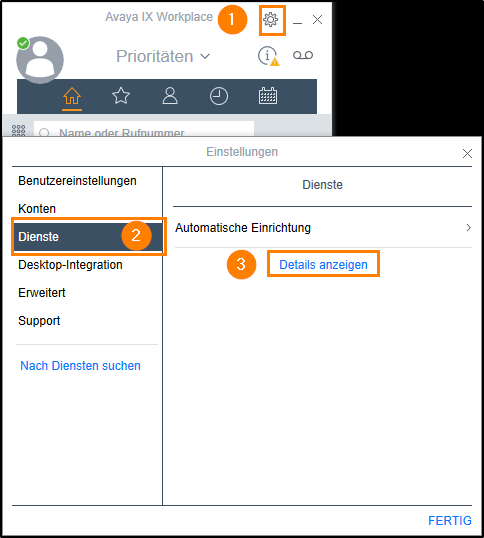
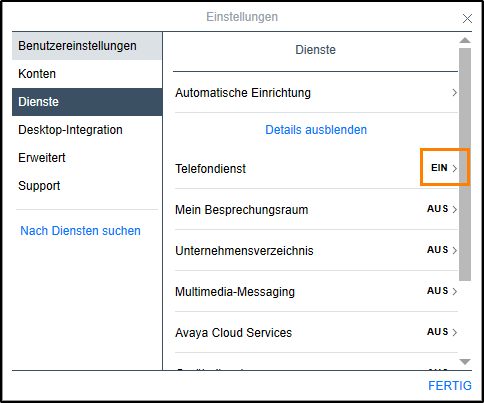
Now open the settings by clicking on
- Click on the gear icon.
- Go to “Services“.
- Select “Show details”.
Click on “ON” under Phone Service.
The following data should now be entered and visible. If no values are entered in the corresponding fields, fill them in as follows:
Phone Service (enabled)
Server Address: 194.94.22.12
Server Port: 5061
Domain: sip.hwr-berlin.de
Use TLS (enabled)
Ad-hoc Conference Address: ConfServer@sip.hwr-berlin.de
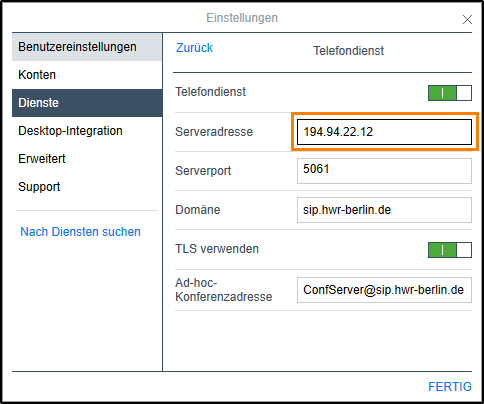
Click on “FINISH” to complete the setup.
Guides about Telephone
Telephone Admin
☏ +49 30 30877 1298
✉ telefon-admin@hwr-berlin.de