Easy data exchange between students, lecturers, employees and for collaboration in internal/external projects. Everyone with an HWR account has access to the cloud and receives 25GB of storage space.
The Advantages
- The data is hosted on the university’s own servers in compliance with the GDPR.
- The data is regularly backed up in the HWR backups.
- Can be used via web browser on any device.
- Access possible via the open source software Nextcloud.
These instructions are divided into 2 sections
- Installation and account registration in the Nextcloud Desktop Client
- Data sharing settings in the web view
Install Nextcloud
Employees at the HWR have the Nextcloud desktop client already installed or can ask the IT hotline to do so. Students and Externals can install Nextcloud themselves:
1. Account registration in the Nextcloud Desktop Client
- Search for Nextcloud icon on the desktop or start menu
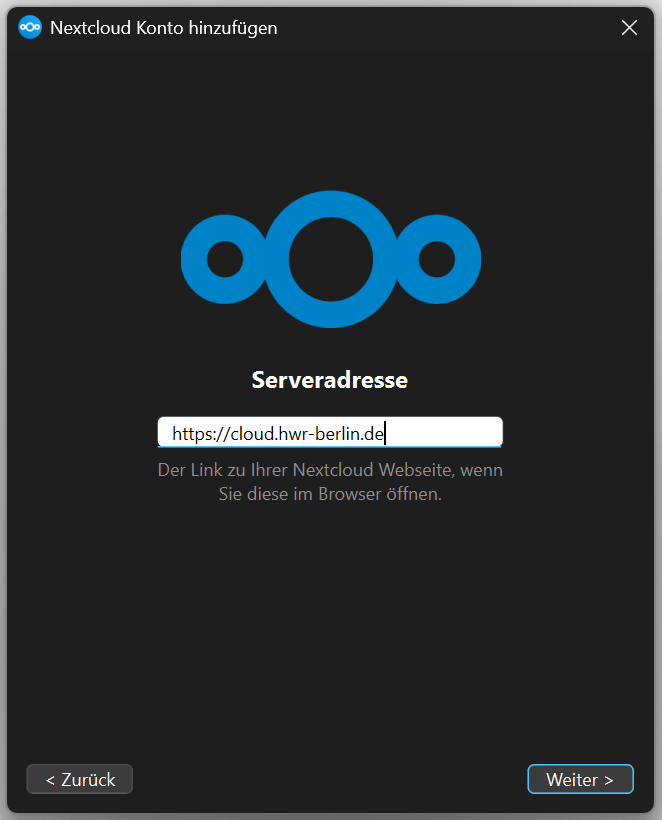
2. Enter https://cloud.hwr-berlin.de and proceed
1.1 Login in the Nextcloud Desktop Client
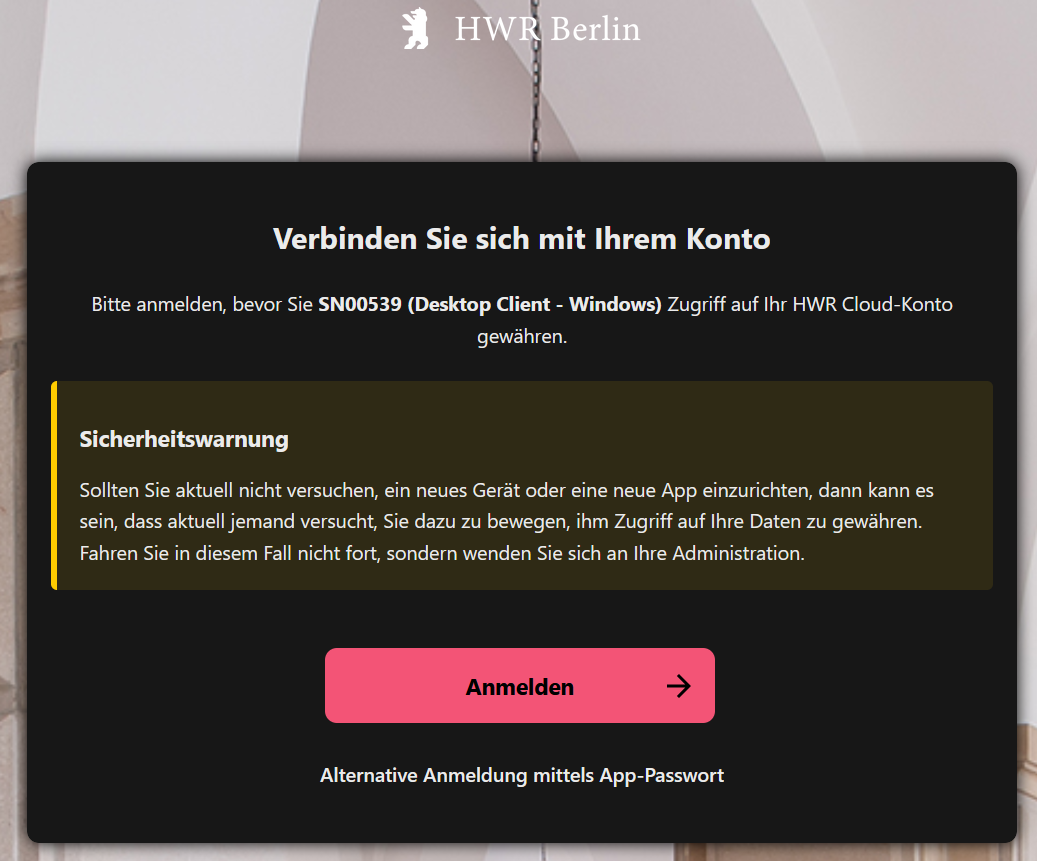
1. The standard browser starts and opens the website to confirm your login.
Note: not possible with the outdated Internet Explorer
2. Log in with your HWR account and confirm access
3. Nextcloud is then available as an item in your Explorer or folder window

2. Web view: data sharing options
- Click on the +person symbol and the share menu will appear on the right. Various options are available there
- Share internally with someone with an HWR account. Enter the email address or user name of someone at HWR Berlin. The person will then receive the share link by email or by notification in the Nextcloud client. The internal link is only necessary if someone cannot find a single file within a folder share and you want to send it to them again separately.
- Share externally via email address to someone with an HWR account and/or Nextcloud account (Federated Cloud ID)

2.1 Web view: external link options
- Create external link: takes about 5-10 seconds
- You must use a secure password.
Take a note of the password as it will no longer be displayed.
You will only have the option of assigning a new one later. - With the validity of the link, you can optionally set an expiration date for the release
- Afterwards you can then set the authorizations for recipients:
Read / Edit / Delete
